Monday, October 16, 2006

Finally, I am Ready

Photobucket - Video and Image Hosting
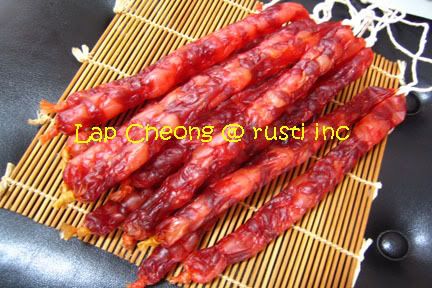
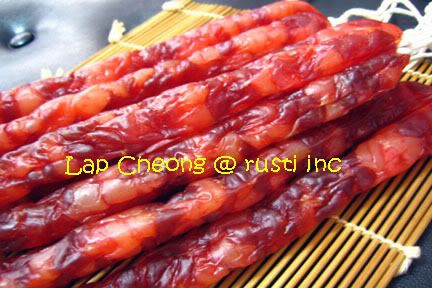
Yes, finally I am ready to post the recipe for the Lap Cheong, or Chinese Sausage.

Since I first posted Of Chinese Sausages & Hot Dogs and then Chinese Sausages Again , I have received many enquiries and requests for the recipe. I did not want to post the recipe then as I was not satisfied with the results. So after three tries, I am ready to share my recipe.

So for Jo of JoDeli, Lance, Vivien92130, the numerous Anonymous readers and my friends who either telephoned or emailed me, here is the recipe:

Ingredients:
350-400g fatty meat
1-1/2 tbsp Gao Liang wine

1kg Lean Pork (from the hind leg)
1 cup sugar
2-1/2tsp salt
2-1/2tsp msg (okay, I know some of you are opposed to msg. Omit if you wish)
1/2 cup Gao Liang wine
1-1/2tsp cinnamon powder
2tbsp fish sauce
Ponceau 4R (光红) food color or char siew food color

Sausage casings - about 5m


Things you will need: a funnel, a pin, parcel twine tied into loops, small strainer.
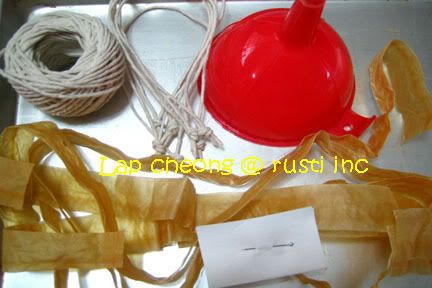
Photobucket - Video and Image Hosting

Method:
1) Absorb all excess water from the fats and cut into 1cm cubes.
2) Mix with the Chinese wine and leave in the fridge to marinate for at least 1 hour.
3) Absorb all excess water from the lean pork and cut into 1cm cubes.
4) Mix with the seasonings and leave in the fridge to marinate for at least 1 hour.
5) Cut the sausage casings into your desired length x 2 + 10-12cm for tying. Soak in water to soften. Give it a few squeeze under running water to remove any dirt and squeeze out excess water.
6) After marination, mix both the fats and lean meat together. Use the strainer to drain off excess marinating liquid before filling.
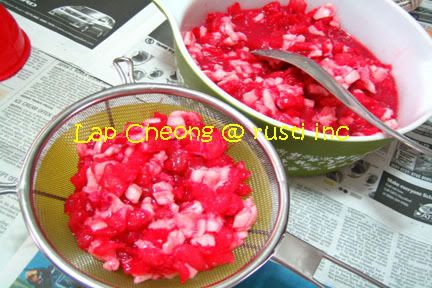
Photobucket - Video and Image Hosting
7) Tie one end of the casing, attach funnel to the open end and start to stuff the meat into the casing.
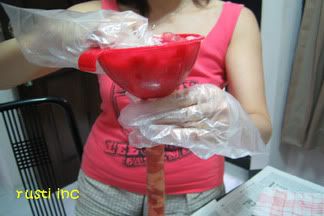
Photobucket - Video and Image Hosting
8) Ease the meat to the end of the casing as you stuff.
9) Use a pin to burst any air-pockets that forms between the meat.
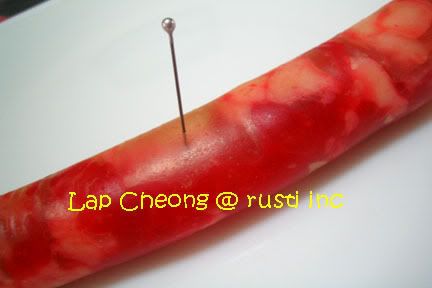
Photobucket - Video and Image Hosting
10)The meat must be quite tightly packed but do not overfill otherwise the casing may split open.
11) Once casing is filled, tie up the other end. Visually divide the sausage into half and twist it to make into 2 links. Tie the twine loop at the link.
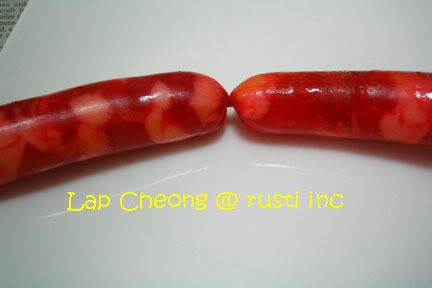
Photobucket - Video and Image Hosting
12) When all sausages have been filled, use a piece of clean cloth that has be wringed out of excess water to wipe down the sausages before drying them.
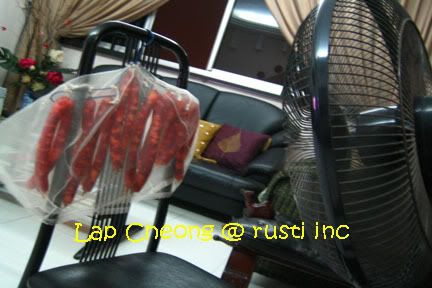
13) Dry by blowing with a fan at it's highest setting non-stop (yes non-stop). I blew the sausages for 48hours and then followed by another 48hours air drying.
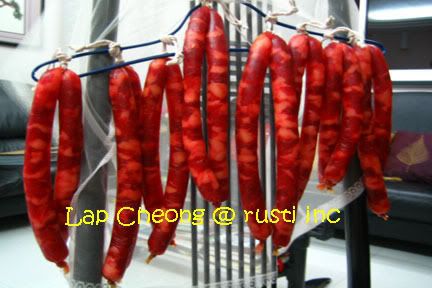
Photobucket - Video and Image Hosting
Note:
1) I cut my casings into 55cm length.
2) For the first knot, you can tie as close to the end of the casing as possible.
3) After filling, it is quite difficult to tie the second knot if you do not have sufficient casing left over. For me, I need about 7cm of casing to comfortably tie the knot.
4) When tying the second knot, do not tie too close to the fillings as you need to give some slack when you twist the length into two links. If you tie too close, your casing may burst due to the pressure applied when twisting.
5) Always inspect the filled sausages for air-pockets and burst them before twisting.
6) These sausages are not too 'sweet', if you prefer a sweeter sausage, you can either omit the fish sauce or add extra sugar.
6) I chose Gao Liang Wine because the alcohol content higer and it helps to prevent the meat from turning bad7) The above quantity yields 8 pairs of sausages based on a finished length of 22cm each sausage, which is longer than the commercial sausage.
8) As no preservatives is used in the process, please store the sausages in the fridge.
9) Sausage casings can be purchased from:
Chop Leong Aik Leong
Blk 333 Kreta Ayer Road #01-28
Singapore 080333
Tel: 6222-0234
Price is S$10/bundle of approx 5m.
Gaoliang Jiu on Foodista

Saturday, October 14, 2006

Happy Birthday Sweetheart

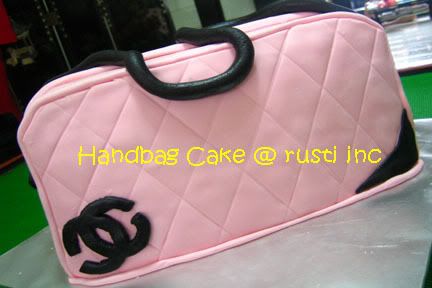
This is for my daughter Sylvia, who is turning 19 in a couple of days.

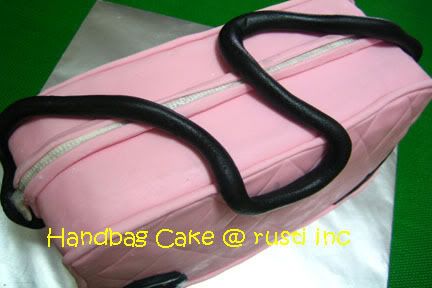
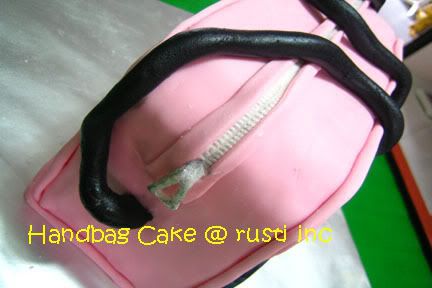
Happy Birthday Sweetheart. Since the real bag is not within my budget, you will have to make do with this one for the time being. Will buy you the real thing when the time is right. That's a promise!

A strawberry yoghurt buttercake sandwiched with cherry-buttercream filling. The cake is covered with marshmallow fondant.

Photobucket - Video and Image Hosting

Photobucket - Video and Image Hosting

Photobucket - Video and Image Hosting

Thursday, October 12, 2006

Ghostly Witches' Fingers


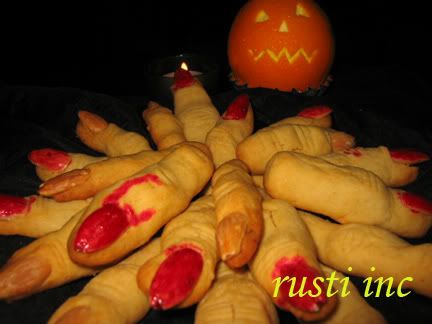
Since Halloween is just around the corner, I thought I'll post this cookie recipe for those who are interested to make them. These cookies were made last year. My daughter and I had so much fun shaping the fingers. It can be quite scary looking at all the 'amputated' fingers lying on the tray as they are so life-like.
The cookie dough is very soft and you will need to refrigerate the whole batch in the fridge till it has hardened. Take just enough dough to work with leaving the balance in the fridge. Make sure the almond is pressed in firmly otherwise it will drop off upon baking. You can give the 'nails' a manicure by painting them with a little red food color. Lastly, do not roll the fingers too fat as the dough expands quite a bit on baking.

Ingredients:
250g butter
50g castor sugar
1 tsp salt
1 egg
20ml cold water
4 tbsp Bailey's Irish Cream
380g All Purpose Flour
1 tsp baking powder
50g Ground Almond
1 tbsp Grated Lemon Peel
3/4 cup Almonds, whole blanched (for finger nails)
1/2 tsp almond extract
Red food coloring (optional)

Method:
1) Cream butter, sugar, salt, eggs and vanilla essence with an electric mixer until a light and fluffy texture is achieved.
2)Add in cold water and Bailey's to the mixture and build in the rest of the ingredients to form a soft dough. Refrigerate dough for about 30 minutes before use.
3)Work with one quarter of the dough at a time and keep the remainder refrigerated.
4)Roll heaping teaspoonfuls of dough into balls and then into finger shapes.
5)Using two fingers, roll across the fingers to form the knuckle.
6) Press almonds firmly on the one end for the nail.
7) Using a paring knife, make slashes in several places to form the knuckles.
8) Place on lightly greased baking sheets and bake in a 160C oven for about 20-25 minutes or until pale golden. Let cool for 3 minutes.
9) You can paint some slashes on the finger with red food coloring as the blood.

Sunday, October 08, 2006

Holy Smoke!

Gosh! The whole island has been enveloped in a thick layer of haze and acrid smell of deliberate deforestation fires set by the Indonesian farmers waft through our noses. The PSI is climbing towards the 150 mark and yet we are having a BBQ party outdoors. As the smoke rises from our grill, I guess we must be the most environmentally unfriendly people 'contributing' to the haze.

Inspite of the haze, it was a great party meeting up with good old friends, making new ones and especially meeting Yvonne, my hostess's niece, whom I have not seen since she was a child some 20+ years ago.

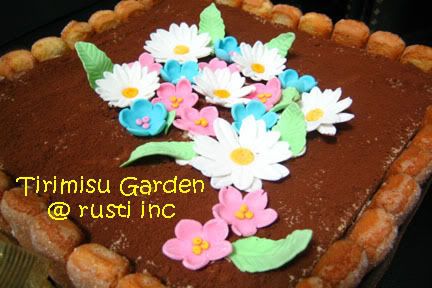
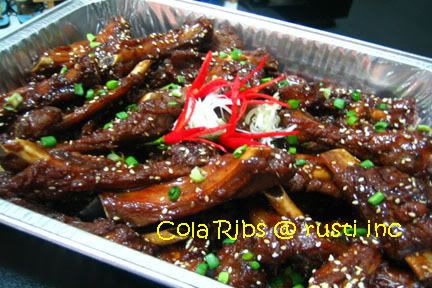
There was plenty to eat and drink. I just love Sally's Japanese Style Salad Rolls which are so refreshing and a nice accompliment to the grilled food. I brought along a dish of Cola Ribs and also made Vi's famous Tirimisu which was so well received by the other guests.

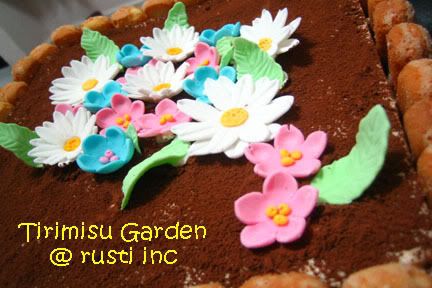
Tirimisu Garden, with flowers made with gumpaste.

Photobucket - Video and Image Hosting

Photobucket - Video and Image Hosting

Cola Ribs
Photobucket - Video and Image Hosting

When you are in good company, time flies and goodbyes were eventually said well after midnight.

Thank You Frank & Jenny for hosting a wonderful party. Looking forward to the next gathering.

Friday, October 06, 2006

Mid Autumn Festival

Today is Mid Autumn or Lantern festival. On the Lunar Calendar, it falls on the 15th day of the 8th month.

What are your memories of the Mid Autumn Festival as a child?

I recall each year the excitement of following my mother to Chinatown to select my lantern. They were the traditional type that is fashioned out of bamboo and cellophane paper or crepe paper. I remembered one year, my mother bought me a lovely bunny lantern made out of white crepe paper. Alas, the lantern got burnt as soon as we reached home as I was so anxious to light it up. The rabbit was promptly replaced with a goldfish the next day but this time, my mother hung the lantern high up in the kitchen to prevent me from playing with it too soon lest I should destroy it again. She brought it down only on the night of the festival.

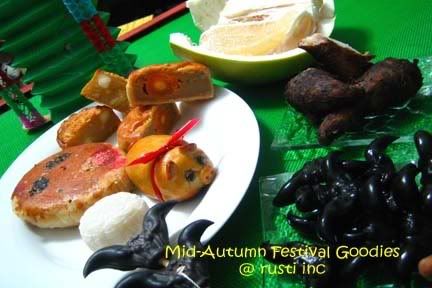
Then there were the memories of the table laden with numerous plates of mooncakes, fruits, kei ji paeng (mooncakes without fillings), pomelos, mini yams and water-caltrops as offerings to the Moon Goddess. Mother would wait for the moon to reach it highest peak before lighting the joss sticks and offering her prayers.

(Clockwise from top: Pomelo, Mini Yams, Water Caltrop, Chinese Spinning Top, Assortment of Mooncakes)
Photobucket - Video and Image Hosting
In the meantime, a mini lantern parade would be started by all the children from the little private estate that we lived in. Even the children from the Indian and Malay families would join in the fun and we would parade around the huge field surrounding our house till our parents called us home. It was such fun then.

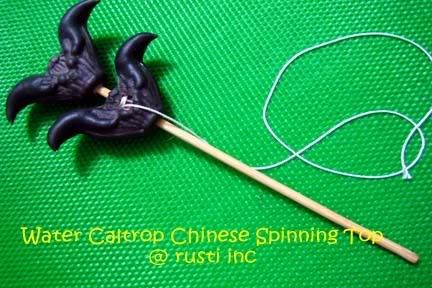
And then there was this Chinese Spinning Top that my brother would make for me with water caltrops. A piece of sturdy bamboo skewer would be pushed through two pieces of water caltrops. A little window would be cut into the second caltrop and the flesh dug out leaving only a hollow shell. A piece of yarn is then attached to the bamboo skewer though this little window. To spin the top, you would have to wind the first caltrop so that the yarn gets taken in through the window. Then you tug at the yarn and the top will spin round and round in both directions, much like the recoil action on a yoyo.

The Chinese Spinning Top
Photobucket - Video and Image Hosting

Still very much a child at heart, my brother-in-law would make me this spinning top so that I could relive my childhood memories. I would unabashedly spin this toy much to the amusement of DH, DS and DD, who could not understand why I get so giggly over it. If you have not seen this Chinese Spinning Top, here is a short video (and I mean short, it is only ten seconds in length) showing how the top works. Yup that's me spinning the top while DS uses his mobile phone to film me in action.

Wednesday, October 04, 2006

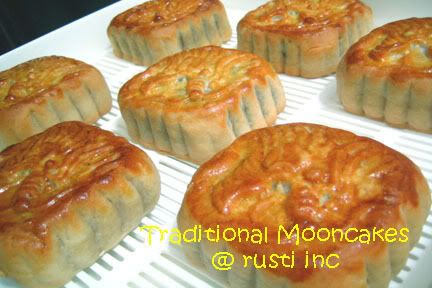
Traditional Mooncakes

With just two days to the Lantern Festival, I thought I had better quickly make my Baked Mooncakes before the festival is over.

Mooncakes filled with White Lotus and a single salted egg yolk to up the cholesterol level.
Photobucket - Video and Image Hosting

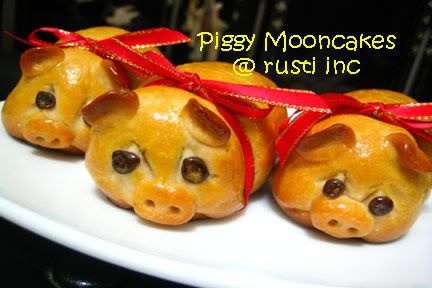
Very sullen looking handshaped piggy mooncakes:
Photobucket - Video and Image Hosting

Saturday, September 30, 2006

Artist Palette Cake

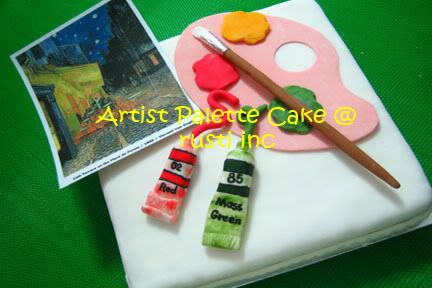
An Artist Palette Cake for an Artist friend.

Photobucket - Video and Image Hosting

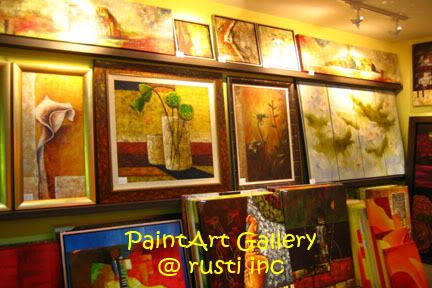
To congratulate Melissa on the opening of her new art gallery, I decided to make her a novelty cake when I visited her at PaintArt today.

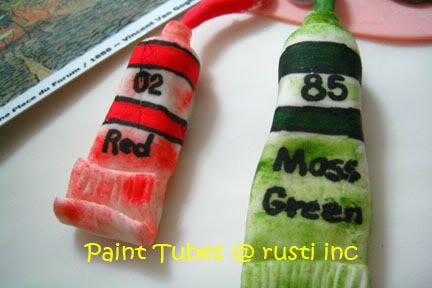
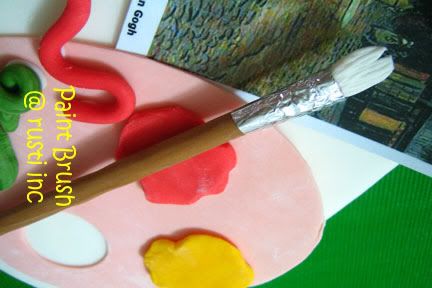
The Walnut Buttercake is covered entirely in gumpaste which is intentionally left in it original color of white to depict a blank canvas. The paint tubes, globs of paint, brush and palette are also shaped from gumpaste. The numbers 02 and 85 on the paint tubes are the address of the gallery. I had also placed a Vincent Van Gogh postcard next to the palette to show that the artist is intending to reproduce "The Cafe Terrace on the Place du Forum" on the canvas.

Paint tubes with the gallery's unit number #02-85
Photobucket - Video and Image Hosting

The paintbrush
Photobucket - Video and Image Hosting

I got to know Melissa through her sister Felicia, who is my colleague. As a student in her secondary days, Melissa had been an active arts club member and would always ace her Art projects. It was during her three year working stint in Shanghai, that she could pursue her interests by taking watercolor painting lessons during the evenings. From watercolors, she graduated to using acrylic paints which is now her preferred choice of medium.

After many years of painting from her home studio, she has now fulfilled her dreams of owning an art gallery. Besides her original pieces of work, she had also brought in many beautiful paintings from around the region that would look perfect in any home. And if you have a favorite picture, like a family photo or a picture of your favorite pet, you could have it preserved for posterity by having it replicated on canvas.

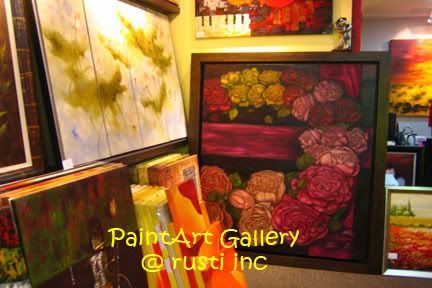
Here are some shots taken of the gallery.
Photobucket - Video and Image Hosting

The giant rose painting in the background is done by Melissa
Photobucket - Video and Image Hosting

Photobucket - Video and Image Hosting

If you are intending to acquire some paintings, do pay PaintArt a vist.

Wednesday, September 27, 2006

Chocolate Snowskin Mooncakes

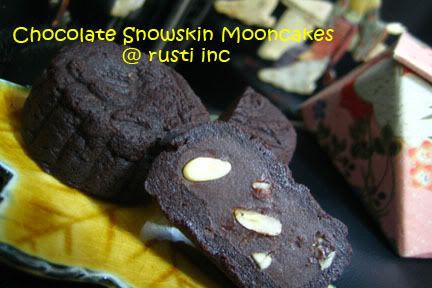
I never imagined that chocolate and lotus paste could be paired together. Wow! Was I ever wrong! It is definitely a marriage made in heaven. Joanna (of Karlsfoodie) offered me some chocolate moonies yesterday. I was a bit skeptical that it would taste nice. One bite and I was sold. It was like biting into a chocolate brownie. Soft and fudgy with a hint of bitterness. The fillings does not taste anything like lotus paste at all. Amazing!

They are not much to look at but then, looks are deceiving. You have to try it and I guarantee that you too would be blown away. Here are my moonies and do try making them yourself. They are awesome!

Photobucket - Video and Image Hosting
(Recipe courtesy of Cecily who attended the Phoon Huat demo class)
Ingredients

Skin
130 ml water
70gm brown sugar
40gm bitter Couverture chocolate(75% cocoa), melted
10gm cocoa powder
10gm chocolate Emulco
20gm shortening
60gm Kou Fien

Method
1) Warm the water and dissolve the sugar in it.
2) Add the melted chocolate, cocoa powder and emulco. Stir well to ensure there are no lumps of cocoa powder. Set aside to cool slightly.
3) Rub shortening with kou fien first before adding chocolate mixture.
4) Mix well and then rest the dough for about 20 mins.
(I substituted one teaspoon of water with one teaspoon of rum)

Fillings
300gm white lotus paste
60gm bitter Couverture chocolate(75% cocoa), melted
1/2tsp chocolate Emulco
Optional - roasted melon seed or macadamia/pine nuts(50 gm)

1) Mix all ingredients together.

Wrapping
1) Scale fillings into required weight and shape into balls.
2) Scale dough to required weight and roll out between two sheets of plastic.
3) Enclose fillings in the flattened dough and press into mould.
4) Knock out the mooncakes and chill in an airtight container before serving.

Monday, September 25, 2006

Silver Shred Rolls (Flower Buns)

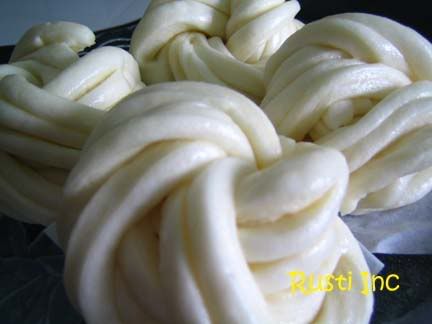
This is at the request of Ssparks
Photobucket - Video and Image Hosting
Silver Shred Rolls

Ingredients:

Starter Dough:
130g HK Flour
70g water (tap water is fine)
1 tsp Instant Yeast

Mix all ingredients well in a bowl. Leave it in a container (like a Tupperware box or a disposal 'takeaway' plastic box). Cover box and leave aside to prove for 2 hours.

Main Dough:
150g HK flour
40g Sugar
15g Shortening
25g Water (tap water is fne)
1/2 tsp Double-acting baking powder

Mix starter dough with the main dough ingredients in a bowl. Knead till a smooth and shiny dough is formed.

Method:
1) Form dough into 25g balls.

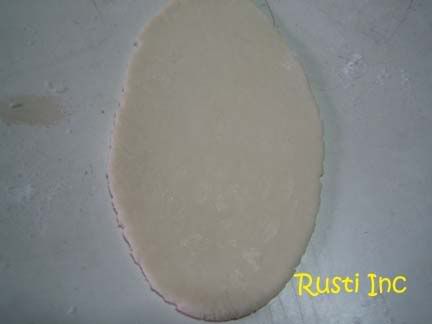
2) Roll dough into a longish shape
Photobucket - Video and Image Hosting

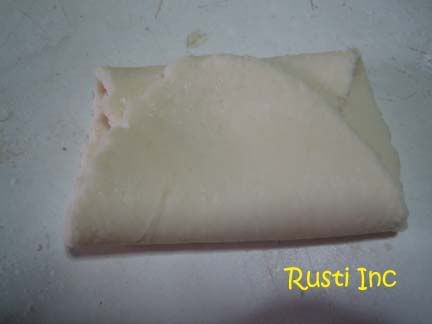
3) Fold both ends toward the centre
Photobucket - Video and Image Hosting

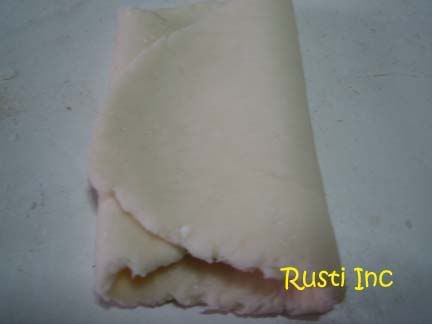
4) Turn 90 degrees
Photobucket - Video and Image Hosting

5) Repeat steps 2, 3, 4 for three more times (total 4 times)

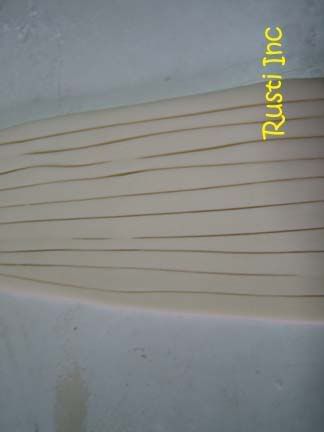
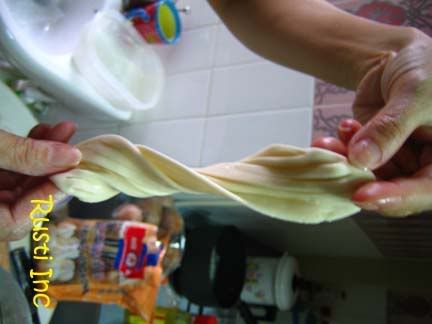
6) Roll into a longish shape and make some line cuts along the dough leaving about 5mm border at the top and bottom edge.
Photobucket - Video and Image Hosting

7) Brush some oil on the surface. Twist both ends in the opposite directions.
Photobucket - Video and Image Hosting

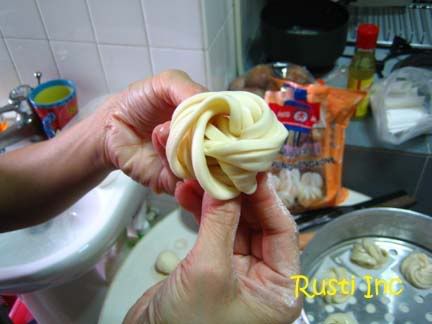
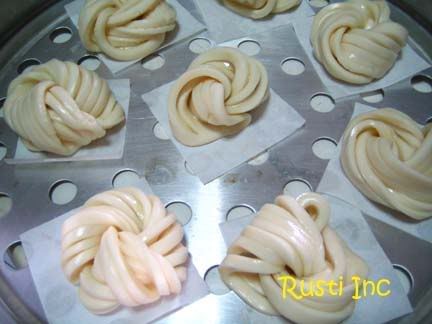
9) Tuck one end under the other end and place on a piece of greaseproof paper.
Photobucket - Video and Image Hosting

10) Let it prove for a further 30 mins before steaming over high heat for 10 mins.
Photobucket - Video and Image Hosting

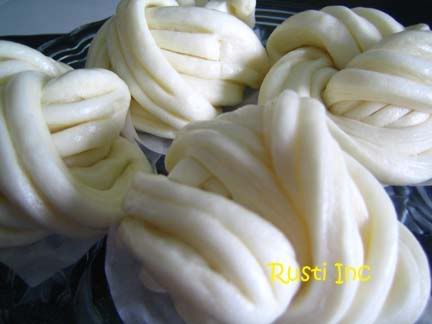
11) The finished product.
Photobucket - Video and Image Hosting

Note:
1) Mantous are not meant to be as fluffy like the char siew buns. The repeated rolling and folding is to ensure a denser texture.
2) For variation, the steamed mantous can be deep-fried in hot oil till just golden brown.

Sunday, September 24, 2006

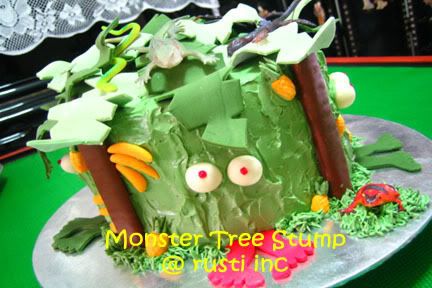
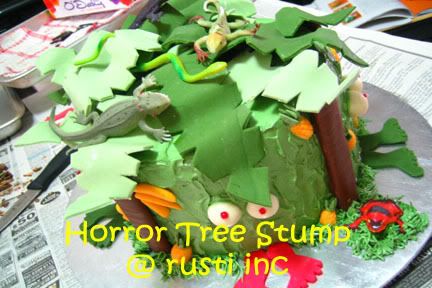
Horror Tree Stump

Photobucket - Video and Image Hosting
Yippee! I have just completed my first novelty cake. The Horror Tree Stump is made specially for my brother's godchildren. My brother, as many of the members from KitchenCaper would know, used to buy my stuff from his overseas trips. Each time he sees anything that might be of interest to me, he would MMS me from abroad and asked if I wanted them. I have acquired bundt pans, silicon moulds, electric takoyaki maker, cookie cutters and plenty more from his trips.

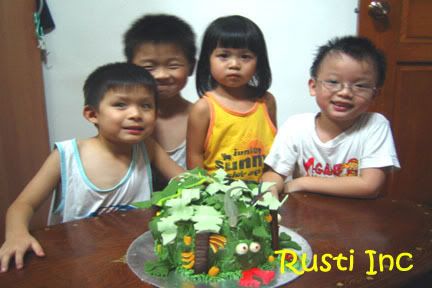
Recently he bought me a book on the most fantastic cupcake creations and also one novelty cakes. As a token of my appreciation to him, I decided to make the cake for the kids.

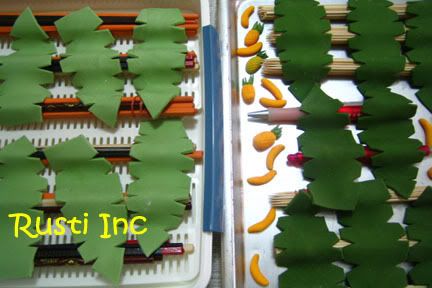
The jungles leaves, pineapples, bananas and monster foot were all shaped from gumpaste. The leaves were made two nights ago to give them sufficient time to dry out. They were draped 'casually' over bundles of chopsticks so as to create the wavy shape.
Photobucket - Video and Image Hosting
The gumpaste bananas, monster foot and pineapples were made shortly before the three layer vanilla sponge was iced in buttercream.

Another view of the cake:
Photobucket - Video and Image Hosting
And the wide-eyed children, sweaty from the playground
Photobucket - Video and Image Hosting

Thursday, September 21, 2006

Stress Reliever - Make Bread

Yesterday, before I knocked off from work in the evening, I had told my colleague that I want to make some bread to 'release my stress'.

For me, breadmaking can be very therapeutical. You just throw all your frustrations into the kneading process. You punch and knead the dough as though trying to get the last breath out of your enemy. Instead of letting my Kenwood knead the dough 100% ready, I had instead machine-knead till about 75% ready and then complete the kneading process using elbow grease.

Poor Doughboy must have suffered some good punches as I threw my frustrations at him to churn out these Sausage Twists. Photobucket - Video and Image Hosting
Phew! What a great stress reliever!

Monday, September 18, 2006

Quick Desserts

Hello Hello! I am back. I will compile photos of the meals that had added kilos to my weight (sigh!) and I hope to have them up by the end of this week. Food is really cheap cheap! Die die must eat.

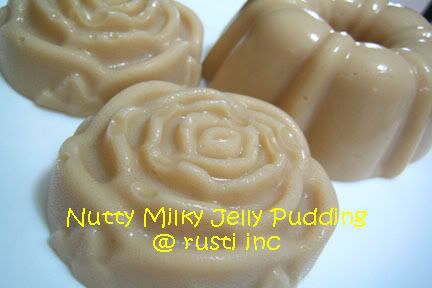
Anyway, on returning I had to get my hands working. Made a super easy and quick Nutty Milky Jelly Pudding for a kiddies birthday party on Sunday. Weird combination of peanut butter, rice flour and coconut milk but tastes very good when chilled.
Photobucket - Video and Image Hosting

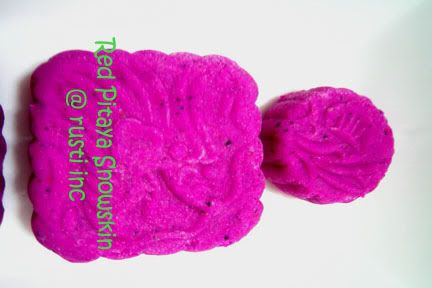
I bought a wooden mooncake mould from KL that is carved with a dragon motif. Just cannot wait but had to quickly 'Open Ceremony' for the mould. Using the red dragonfruits bought from Malaysia, made some Pitaya Snowskin Mooncakes. What a glorious purple and it's all 100% natural with no added food colors.
Photobucket - Video and Image Hosting
Ingredients:
150g kou fen
200g icing sugar
70g shortening
120g red dragonfruit (chilled)
80g iced water
A few drops of banana essence (optional - add to iced water if used)
Extra kou fen for dusting

Fillings:

Your choice of lotus paste
Salted eggyolk (cooked)

Method:
1) Dice dragonfruit and blend into a puree.
2) Sift kou fen and icing sugar into a mixing bowl.
3) Mix in the dragonfruit puree and iced water.
4) Add in shortening and mix till dough is smooth.
5) Cover and set aside to rest for 30 minutes.
6) Scale lotus paste and skin to fit your mooncake mould.
7) Flatten out the skin between two pieces of plastic wrap.
8) Enclose lotus paste in skin and press into well dusted mooncake mould.
9) Turn out and chill in an airtight container before serving.

Tuesday, September 12, 2006

Eat-Drive-Eat-Drive Holiday

DH & I will disappear for 4 days on a Eat-Drive-Eat-Drive holiday up North. So till I am back on Sunday, au revoir.

Monday, September 11, 2006

Soupy Buns for the Soul

It is touted as THE place to have Xiao Long Baos and it was even reported in the media that you have not visited Taiwan till you've visited Din Tai Fang for their XLBs.

Back in Singapore, the queues forming outside Din Tai Fang is testament to their fame. They even have an electronic queuing system to issue Q-numbers to their waiting patrons. I have never queued for their XLBs. However I could see through their see-through kitchen, their chefs huddling in groups, frantically pleating 'exactly 18 folds' into each XLB. '18 folds', that is their 'exact standard' to be precise.

To me, a Xiao Long Bao is a Xiao Long Bao whether 'exactly 18 folds' or not. The important thing is that the soup within each bao must squish out at the first bite and that the skin must not tear when you lift each bao with a pair of chopsticks.

My baos may not look as pretty as DTF's 18 fold XLB but hey, they still flooded my mouth with fragrant soup at the first bite and the skin did not break when the bao was lifted with a pair of chopsticks (yeah yeah okay, so my bao skin is a little thicker than DTF's! Happy?). Served with julienne ginger in black vinegar, my baos actually tasted very good! Slurp.

Photobucket - Video and Image Hosting

~~~~~~~~

From XLBs to radish kueh (cakes). Did you know that ready steamed yam cakes or radish cakes are now available from the supermarkets? They are vacumn packed and sold in rolls that looks like a neck roll. For S$2.30, you can fry enough to feed your family and also your neighbours to your left and right. DH bought a humongous roll yesterday and then deftly whipped up a fried dish of fragrant, slightly spicy radish cake. Besides adding chye poh, eggs, fresh juicy prawns and silver sprouts (head & tailed beansprouts), he also added ground flounder fish which gave an extra kick to the dish. We would have loved it to be more eggy but then realised too late, that there was only one egg left in the fridge.

Photobucket - Video and Image Hosting

Saturday, September 09, 2006

Cranberry-Haws Cheesecake

This is for you Eileen.

Photobucket - Video and Image Hosting

Adapted from:
Source: Chai, K. (2005), A Touch of Classic Baking
Malaysia: Famous Cuisine
.

Ingredients:

Base:
200g cornflakes (crushed)
70g haw flakes (grounded)
120g butter (Melted)

Combine all ingredients together and press firmly into a 9" (23cm)springform cake tin.

Cheesecake:
500g cream cheese (room temperature)
100g caster sugar
3 eggs
200ml milk
1/2 tsp vanilla essence
3 tbsp cornflour

1) Mix milk, essence and cornstarch together till smooth and without lumps.
2) Beat cream cheese with sugar till soft and smooth. Beat in the eggs, one at a time, beating well after each addition.
3) Add in milk mixture and mix well.
4) Pour mixture over the cornflakes base and bake at 160 degreeC for about 50 minutes.
5) Regrigerate the cooled cake overnight

Jelly Topping:
100g haw flakes (grounded)
400ml cranberry juice
30g instant jelly

1) Mix all ingredients together and boil till everything is dissolved.
2) Cool slightly and pour on top of the cake. Don't wait too long for the topping to cool as the jelly sets real fast.
3) Chill cake before unmoulding.
4) Decorate with whipped cream and additional haw flakes.

Advance Cake Decorating

Finally, my four lessons on Advanced Cake Decorating has ended.

I feel I am not cut out to do cake decorating. My hands are shaky and I am still unable to apply the correct pressure on the icing cone. Though the flowers are better executed, the animal figurine is another story. They are either deformed or mutated!

Elephant: Does it look anything like an elephant to you? It is more like a cross between an elephant and a rhinosaurus. His trunk seems to have been chopped off leaving a snout like nose.

Photobucket - Video and Image Hosting

Duckling: They are supposed to be so cute and adorable. Sadly what I have produced is the proverbial Ugly Duckling. I am sure Hans Christian Andersen would have been so proud to use my duckling as the cover picture for his famous storybook.

Photobucket - Video and Image Hosting

Clowngirl: This is a different piping method from my Freaky Clown. In the Freaky Clown, we had only to pipe the body as the clownhead is a readymade plastic cake topper. For this Clowngirl, we had to pipe the collar, face, features and hair. To tell you the truth, I had intially piped a Boy Clown. But because I had given him very effiminated features on his face, my instructress decided to give him a 'sex operation' by adding long yellow tresses complete with ribbons, thereby turning a him into a her.

Photobucket - Video and Image Hosting

We were also taught how to pipe other animal figurines like Garfield, frog, rabbit head and bulldog. Mine turned out so hideous looking that I did not even bother with taking photos. They were just so arggh looking.

As in the Basic course, we had to decorate a cake in order to 'Graduate'. We have the option of doing an animal or floral theme. I decided on the floral theme as it is easier and is less time consuming as I do not have work with so many colors.

So finally, my Blooming Birthday cake. Simply decorated with roses and rosebuds. My instructress assessment is that the yellow is too intense and the leaves under the roses could have bigger. My arrangement of the roses is a bit wrong as I did not follow the correct 'size' convention. On the whole, she says it is quite good. (I secretly wondered if she had ever failed any student!) On my part, I was pretty satisfied with my artwork especially the wordings, which is my virgin attempt at writing with icing.

Photobucket - Video and Image Hosting

Thursday, September 07, 2006

Fly Me To The Moon

This month, along with my credit card statement, there were a couple of promotional leaflets from some of the leading hotels & restaurants in Singapore touting their Mid-Autumn offerings of mooncakes and snowkins.

The plebeian baked lotus paste with an orange-crimson salted eggyolk is no longer good enough to satisfy the modern tastebuds of the new generation consumers.

They now comes in a myriad of colors, flavors & fillings, ranging from ice-cream, champagne truffle, yam, greentea, chempadak, XO brandy, rum & raisin, chocolate pearl, cranberry, chocolate, durian and even exquisite birdnest. One of the newer concoction is the Bailey's Irish Cream Snowskin which one hotel has promoted as their 'New' flavor on the leaflet.

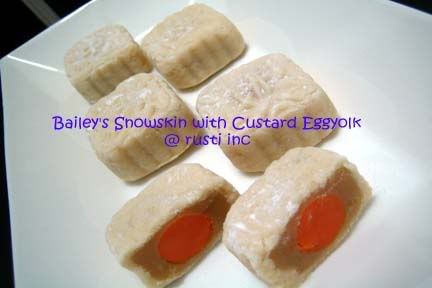
Having a bottle of Bailey's at home, I decided to go into my kitchen laboratory to come up with my own version of this snowskin.

First, I need to think of what to use in place of the salted egg yolk. Adapting a soft custard filling used for sweet buns, I added a good cup of Bailey's, a dash of Kahlua and some greenbean powder to make it into a semi-hard pudding-like mixture which I allow to set overnight. Then using a watermelon baller, I scoop the set custard into round balls. Ta-Da, pseudo-eggyolks.

The skin is easier to concoct as all I did was to reduce the sweetness and then added some Baileys and tirimisu cream to an existing snowskin pastry recipe.

I left the filling of white lotus paste in it's original flavor without any modification.

The end result is a very delicate snowskin, with the color of pale skintone (the skin needs further working to make it smoother though!). The fragrance of Bailey's come through when you bite on the pseudo-eggyolk, which is not too sweet and best of all,you do not get that cloying feeling from eating a real eggyolk.

Photobucket - Video and Image Hosting
Verdict? I give myself 3.25 out of a 5-star rating.

Monday, September 04, 2006

Quick Snacks

I have been pretty busy of late and though I had made some quick snacks the last couple of days, I did not find the time to post them till now.

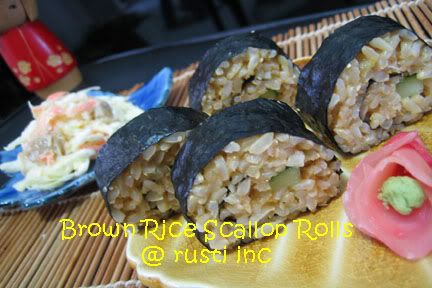
First up, a healthy Brown Rice Scallop Rolls. Added Japanese seasoned scallops, grated carrots and a light seasoning of Konbu Tsuyu to the brown rice. Had to 'disguise' the brown rice as a sushi rolls to trick 'unsuspecting' adults aka DH/DS/DD to eat brown rice as they do not like it's texture and taste. Don't say I did not try to feed them something healthier!

Brown Rice Scallop Rolls. Served with a side dish of Jap coleslaw with softened Japanese seasoned scallops.
Photobucket - Video and Image Hosting

~~~~~~~%%%%~~~~~~~

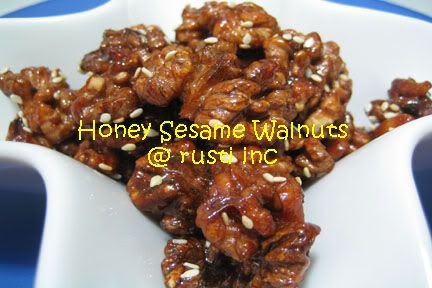
Next, Honey Sesame Walnuts that is so addictive that they are gone in the wink of an eye. How many times in a Chinese restaurant have you wished that the serving of walnut appetiser is bigger? And each time you've cleaned the plate of every single morsel of this delightful snack, how have you wished that they will refill it for free? Wish no more as this is very easily prepared and you can make enough to satisfy your cravings.

Honey Sesame Walnuts (Recipe courtesy of Sin Heng aka Sinner)
Photobucket - Video and Image Hosting
Ingredients:
250g walnut halves
3/4 cup honey
1 tbsp lemon juice
1 tsp soy sauce
Castor sugar

Method:
1) Combine honey, lemon juice and soy sauce.
2) Add walnuts and marinate for 2 hours, stirring occassionally.
3) Drain walnuts through sieve. (The honey marinade can be frozen for another batch of walnuts.)
4) Toss walnuts to coat in sufficient castor sugar.
5) Fry in hot oil to just enough to cover walnuts, until golden.
6) Remove and drain well.
7) Cool completely before eating.

Note:
1) Do not overbrown the walnuts as they will continue to caramelize further after removing from the hot oil.
2) In Singapore, due to the high humidity, the walnuts can turn 'wet' easily. It is best to pack the nuts into serving size packets so as not to introduce too much air to the whole batch of nuts.
3) I sprinkled the walnuts with toasted sesame seeds immediately after frying.

~~~~~~~%%%%~~~~~~~

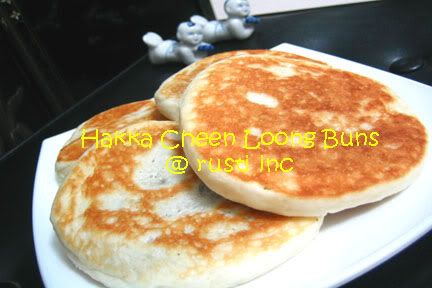
Finally for those who do not own an electric oven, what about making these pan-fried Hakka Cheen Loong Buns. I first come across them on Yochana's Cake Delight . I have never seen them in Singapore before much less tasted them. Have you?

Nice and soft Hakka Cheen Loong Buns. Best served piping hot.
Photobucket - Video and Image Hosting

Friday, September 01, 2006

Mango Egg Tarts


I have scribbled the date on the recipe sheet. It says May 2000 ~ six years three months ago. Aeons since I attended the class and I have not once made these tarts. It was through a conversation with Lucy aka Yochana, that I recalled having the recipe stashed somewhere in the deep recess of my cupboard.

Having dug it out, I finally got round to making these Mango Egg Tarts a couple of nights ago.

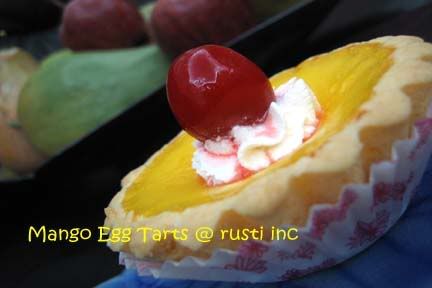
The custard is nice and smooth, like the texture of silken tofu. If you are not one for eggy tasting custard, then this is a nice recipe to try as the fragrance of mangoes (I had used the sweet & fragrant Pakistani mangoes) would have somewhat mask the smell of eggs. The tart shell is short and crumbly because of the use of pastry margarine. The recipe did not ask to blind bake the shells but I had experimented both ways. With blind baking, the shells were definitely crispier freshly baked. However by morning, both shells have turned soft although those that were blind baked were not as soft as those that were not. So unless you intend to consume them immediatey on baking then do blind bake them. Otherwise, don’t bother. The difference is really not great overnight.

Mango Egg Tarts

Pastry Shells:
110g pastry margarine
110g butter
205g sugar
60g eggs
350gm plain flour sifted with 5gm baking powder

Mango Custard:
200ml warm water (180ml if you prefer a firmer custard)
120gm mango puree
130gm sugar
180g milk
250g eggs (beaten)
Yellow color
Mango essence

Method for the Shells:
1) Cream pastry margarine, butter & sugar for 10 mins.
2) Add in eggs and beat well.
3) Mix in the sifted flour using low speed.
4) Once dough is formed, remove from bowl, knead lightly to distribute evenly. Cling-wrap the dough and rest for 15 minutes.

Method for the Custard:
1) Dissolve sugar in the warm water and add in the mango puree.
2) Cool and add in the milk, yellow color and essence.
3) Whisk in the eggs slowly ensuring no froth forms (strain if necessary) and set aside.

Assembling:
1) Preheat oven to 190-200degC
2) Press small pieces of dough into ungreased tart pans.
3) Prick the base a few times with a fork.
3a) Pour in the custard and bake for 15-20 minutes.
Or
3b) Blind bake for about 5 minutes, then pour in the custard and bake for 15-20 minutes.
4) Do not overbake. The custard should still be a bit wobbly in the centre. It will firm up on cooling.