Saturday, December 26, 2009

Christmas Bakes

Fruitcake,Fondant,Christmas

My Christmas bakes started quite late this year.

Normally, for the fruitcake, I would soak the dried fruits in the first week of November and then bake it in the second. I will then let the fruitcake mature slowly and lovingly brush them with liquor every few days apart till decorating them near Christmas. This year however, I had about ten days in all to soak, bake and mature the cake

I made four 7cm round cakes in all. Two were covered and decorated with fondant. One was decorated simply with dried fruits. And the last.......it is still wrapped in clingwrap and brown paper to mature further.

Sleeping Santa ~ Well, Santa has lots of work to be done on Christmas Eve distributing Christmas pressies to all the kids and of course to you and me. So he really needed to sleep well to have enough energy to run around town.
Fruitcake,Christmas,Fondant

Another Sleeping Santa ~ Sorry for the blurry photo. I have a fantastic Nikon D90. Unfortunatly, I have yet to master how to take good pictures with it. Sigh!
Fruitcake,Christmas,Fondant

The Plain Jane
Fruitcake,Christmas

I also made some Gingerbread Men, Hearts and Stars for my colleagues and their kids. They were decorated simply with sprinkles and mini M&Ms.
Cookies,Christmas
Cookies,Christmas
Cookies,Christmas

Saturday, December 12, 2009

Cookie Bouquet

This is the cookie bouquet which I made last week. The sugar cookies were decorated two ways. Some were first outlined in medium consistency royal icing and then flooded with thin royal icing. The others were decorated with sugarpaste which were 'glued' on using piping gel.

Christmas Themed Cookie Bouquet
cookies,fondant

cookies,fondant

Cookies; fondant;

Tuesday, November 10, 2009

The Classic Poundcake

Saturday morning and I was goggling aimlessly for cake recipes - any cakes it does not matter as I have nothing specific in mind ~ sponge, butter, angel, brownie, chocolate, mud, ……. Pages and pages were uploaded and finally I settled on something quintessential, the classic Orange Pound Cake.
As the name implies, a true pound cake uses butter, flour and sugar in equal ratio of a pound each which by the way, is how the cake derives its name (as though this is some marvelous new news to you). This just has fresh orange juice added to it for the citrusy flavor and to lend it a rich golden color.
I made half the recipe, followed all measurements but just held back 30gms of sugar and the cake turned out perfect - moist, buttery, fine crumbed and not sweet. Perhaps the sourness of the orange juice has given it a good balance.
I baked them in a six-hole mini bundt pan and once baked and cooled, they were drizzled with a simple frosting made with fresh orange juice and icing-sugar. The result? Perfect paired with a cup of hot Earl Grey tea.

Photobucket
Alas it was only while uploading the photo to Photobucket that I realized I had forgotten to take a cross-section of the cut cake to show you how fine the cake was.

Tuesday, October 20, 2009

A Wedding Cake for a Birthday Celebration!!

What in the world is a Wedding Cake doing in a Birthday party you may ask.
Photobucket
I made a Croquenbroche, which is a traditional French Wedding Cake for my extended family's mass birthday celebration which falls in October. Croquenbroche which literally means "crunch in the mouth" is a tower of profiteroles stacked into a conical shape and drizzled all over with toffee. When you put one of these profiteroles into your mouth, you will bite into the crispy and crunchy toffee, which gave the cake its unique name.

Well October is the month in which there are so many of us in our family celebrating our birthdays and it has become an annual tradition whereby we will have a mass birthday party. My Croquenbroche is an updated version which I shamelessly copied from a very popular bakery in Singapore. I first laid eyes on this beautiful creation when I attended my boss's housewarming party in late September. As his wife had just celebrated her birthday a day earlier, the hardly touched birthday cake was also brought out for all of us to enjoy. That was where I got the idea to make this cake for my mass birthday party. Whilst hers was a 20cm/8inch cake with 40 profiteroles stacked on top, mine has to be much bigger for there were so many of us.

For the base, I made a 10inch square chocolate cherry cake covered with a layer of yummy and sinful rum-laced dark chocolate ganache. It was then topped with close to 80 pieces of plum-sized custard-filled profiteroles.

About half of these profiteroles were frosted in melted dark and pastel-colored white chocolate. They were then decorated with handmade sugar flowers, chopped almonds and silver & gold Nonpareils. The completed Croquenbroche was given a finishing touch with three handmade sugar Gerbera Daisies and fresh Physalis.
Photobucket
My, the whole cake weighs a tonne and am I glad I had the foresight to drive eight dowels into the cake to support the entire creation. I dread to think what would have happened had this not been done and I am pretty sure the cake base would be squashed from all the weight pressing down on it.

Until the next mass birthday party, my sincerest best wishes to my brothers Clarence and Charles, sister Yvonne, sister-in-law Betty and Susan, nephew Alvin, niece Joey, niece-in-law Riana and her toddler daughter Krisalyn, nephew's girlfriend Michelle, my daughter Sylvia and to ME. Yes me! I am an October baby too!

Sunday, September 13, 2009

More Moonies

More Moonies. Chocolate Moonies this time. The first time I made this was two years back with the fillings made out of lotus paste and chocolate. This time around I used Dou Yong, which is green bean paste. There is no real taste difference between lotus paste and bean paste though. For the skin, I had used Dark Muscovado Sugar instead of the normal brown sugar and it gave a richer molass taste. For decoration, I added a strip of pure gold foil to the skin.

Chocolate Snowskin
Mooncakes,Chinese Pastries

Photobucket

Saturday, September 12, 2009

Moonies

It has been ages since I updated this blog. As usual, I have been submerged under piles of work and meetings that took me away from my desk most of the time which resulted in even more work piling up.

Last Saturday, I finally found some time in the evening to make my first batch of mooncakes. I made a Nutty Bacon Mooncake which is the traditional baked type and a Mint Snowskin with white lotus paste, which is the chilled type.

The Nutty Bacon Mooncake is a quite similar to the Five Nuts Mooncakes except that it uses streaky bacon fried to a crisp instead of using the sweeter bakwa. The bacon lend the mooncakes a savoury smokey flavor and crunch. It is also not as oily as the commercial type as some bakery also add diced cooked pork fats to the fillings.

Nutty Bacon Mooncake
Mooncakes,Chinese Pastries

Mooncakes,Chinese Pastries


The chilled Snowskin is really refreshing with the added mint essence. As you swallow each bite, you could feel the cool mintiness gliding down your throat.

Mint Snowskin Dome
Mooncakes,Chinese Pastries

Mini Mint Snowskin
Mooncakes,Chinese Pastries

This is the Basic Snowskin Recipe I used:
150g Kou Fen (cooked glutinous flour)
180g to 200g icing sugar
40g shortening
220g chilled boiled water
Food color and essence as desired
Prepared lotus paste, bean paste or other fillings.

Method:
1) Sift kou fen and icing sugar together.
2) Rub in the shortening till evenly distributed.
3) Add the water and knead into a smooth dough.
4) Put into a plastic bag and let it rest for about 20 minutes before using.
Note: If using essence and color, mix it directly into the water before adding to the kou fen.

Wrapping:
1) For the mini snowskin above, I scaled the skin into 20g and fillings into 30g.
2) For the dome shaped snowskin, I scaled the skin into 150g and fillings into 70g.
3) Roll the scaled skin into a ball. Put it into a plastic bag and press with your palm to flatten.
4) Wrap fillings with the skin and press into moulds.
5) Chill in an airtight container before serving.

Sunday, July 26, 2009

Excuse Me, Are You A Cake?

Photobucket
Cupcakes: “Errh excuse me, are you a cake?”
3-Tier Cake:“Well yes, of course I AM a cake. Isn’t that obvious? I look every inch a cake don’t I?
Photobucket
Single Tier Cake: “If you are a cake, why don’t you smell like us? You do smell funny. You know that don’t you?”
3-Tier Cake:“I don’t smell like you only because I have a big bottle of baby powder tucked right in my middle! And quit being so rude to me, I am much taller and stronger than you guys and you know WHAT that means don't you?”
Photobucket
Edna Faith: "Hey you cakes, quiet down. This is my party and don't steal my thunder or I will have you all eaten up. And Diaper Cake, I am not done with you till I finished MY BUSINESS on your smug face."

Ha Ha! I can imagine this conversation going on at the table amongst the Cupcakes, Single-tier Cake and Diaper Cake, as they eyed each other with suspicion.

It was Edna Faith’s Full Month party and I made this Diaper Cake for J, the baby girl’s mummy. Knowing that L and G will be bringing some lovely edible cakes to sweet Edna's party, I opted for a conventional baby gift presented in an unconventional way. A Baby Diaper Cake.

The baby diapers are rolled up individually and arranged in rings and then finally stacked into three tiers to look like a cake. The cake was decorated with other ‘ingredients’ like roses made with baby socks, pacifiers, toys and a pretty headband.

Diapers all rolled up and fastened with ribbons and rubberbands.
Photobucket

Roses made with baby socks.
Photobucket
Diaper rolls adorn with a butterfly
Diaper Cake

The whole 'confection' is topped with a You’re Sooo Sweet cake topper.
Photobucket

Friday, July 10, 2009

S-M-L Cupcakes

Cupcakes,Frosting
If you are expecting to see cupcakes in Small, Medium and Large sizes, then you have been mislead by my post title.

S-M-L here refers to the Strawberry, Mint and Lemon frostings atop the cupcakes.
Cupcakes

I first came across the recipe for crusting buttercream about three years ago and about how you can achieve a real smooth frosted surface on a cake by using Viva paper towels. Being one with really shaky hands that can make cake decorating with any types of cream turn out looking like earthquakes, I never bothered to test out the crusting buttercream. Not until now.

Two Saturdays ago, I strolled into the basement of the Paragon Shopping Centre and spotted a popular deli there. Inside their refrigerated showcase, were some brightly frosted cupcakes that seems to be beckoning to me. The Lemon Cupcakes looked so darn pretty delicious that I had to buy one to satisfy my desires to bite into them.

It was love at first bite when I realized the frosting was a Crusting Buttercream. And so this is how it tasted! The exterior of the frosting has dried into something slightly softer then that of royal icing and it does not stick to your fingers when touched. Beyong the crusted surface, the insides are still soft. It was a much neater eating as you do not get cream sticking all over your lips. The cake though, was really nothing to shout about. DH and DS who had a bite each commented that my cupcakes tasted better. I should be pleased with the compliments but my focus then, was diverted to the frosting and not on the cake. I imagined how it would taste with different flavors added.

The following week, I had the chance to test out a batch of the Crusting Buttercream on some cupcakes for a family weekend gathering.

I flavored the frosting with strawberry syrup, mint essence and lemon paste. The results were good especially the mint and the strawberry. They crusted nicely and although it is made mostly with shortening (oh I can hear some gasps in the background), it tasted neither oily nor waxy. After the frosting has crusted, it was a breeze to handle the cupcakes. You know how fiddly it is to handle cupcakes that have been iced in regular frosting or creamcheese frosting. There is this tendency that the cream will get smudged!

Strawberry - Using Alteco #853 Deep Cut Closed Star Tip
Cupcakes,Frosting
Mint - Using Wilton #48 Basketweave Tip
Cupcakes,Frosting
Lemon - Using Alteco #195 Special Decorating Tip for Drop Flowers
Cupcakes,Frosting
The feedbacks were good compared to regular icing although some still preferred the usual creamcheese frostings that I usually make.

All packed and ready to go in my Cupcake Courier.
Cupcakes,Frosting
Cupcakes,Frosting

Postscript (1 August 2009)
At the request of several requesters, I have added information of the icing tip used for the different designs.

Sunday, June 28, 2009

Berry Nice Strawberry Bars

I have so far only tasted Lemon Bars which I loved for its citrusy flavor. So when I came across a recipe for Strawberry Bars I told myself that I have to try it out for myself.
Fruits,Strawberry,Berries
If you can imagine eating a buttery shortbread that is spread with strawberry jam then you are almost there. The Strawberry Bar is one notch better as the 'jam' part is part custardy and sticky at same time. Lemon juice and zest gave it the tangy kick while the distinctive strawberry makes this a 'berry nice' bars.

Cookies,fruits

Friday, June 26, 2009

My Beef Stew

This was last Sunday's lunch which I only found time to post now. I did not follow any recipe but made a shopping list of the ingredients I think I need. I ended up with 2 trays of beef chuck tender, 2 bags of carrots, 1 bag each of large onions and potatoes, 1 bottle of Virginia Dare Cooking Sherry, 2 boxes of chicken stock, a 3-pouch pack of Masterfood Bouquet Garni. On an impulse I added two cans of stewed whole tomatoes into the trolley. Not wanting to have any vegetables leftover from cooking, I proceeded to use up everything in sight. So in a way, I created my own recipe as follows:
beef stew
My Beef Stew
Ingredients:
1.7kg beef chuck tender, diced into cubes
500gm large onions, chopped
1kg carrots, diced in big chunks
1kg potatoes, quartered
12 garlics, smash and remove skin
375ml cooking sherry
2 litres chicken (or beef) stock
2 x 411g canned stewed whole tomatoes (I added the juice from only one can of tomatoes)
2 tbsp maple syrup (also added on an impulse to balance the sourness of the tomatoes)
2 pouches bouquet garni
4 tsp black pepper
4 tsp worchestire sauce
Flour for dusting
Olive Oil

Method:
1) Dust the beef in flour and brown in batches in some olive oil. Set aside.
2) In a deep pot, sweat the large onions in some olive oil. Add garlic and continue sauteing until the onions is almost caramelised.
3) Add the browned beef, black pepper and worchestire sauce and stir for a while. Add in the cooking sherry. Let it simmer for a while to evaporate the alcohol.
4) Add the bouquet garni, carrots and 1 litre of chicken stock. Bring to the boil and then lower heat. Simmer for about 45 minutes stirring occasionally.
5) Add the potatoes and the balance 1 litre of stock and continue cooking till beef is tender.
6) Adjust seasoning. (At this point, I added the maple syrup!).
7) Serve hot with a crusty bread and a green salad.

Washed down with a glass of refreshing Mint Lemongrass Lemonade Chiller
beverages,drinks.
Note:
1) You may wish to thicken the stew if you find it too watery. I made a roux by melting approximately 100gm of butter in a small saucepan over low fire. Add 1 heap tablespoon of flour and fry till the flour turns slighty brown. At this point remove the saucepan from the flame and pour in a 1/2 cup of water and stir till smooth. Bring saucepan back to the flame and stir till thick and shiny. Temper the roux with some gravy from the stew before adding it to the stew to thicken it.
2) I did not add any salt to the stew as the chicken stock is already salty as is the bottle of cooking sherry from Virginia Dare.

Cupcakes for my Daughter

Today is the last day of work for my daughter at a designer furniture company. She has worked there for slightly over a year and she decided it is time to make move to a position that has more relevancy to her Mass Communications Degree.

These cupcakes are for her to bring to the office as a farewell treat for her colleagues.

Vanilla Cupcakes using a recipe from the Magnolia Bakery and with a Creamcheese Frosting that I put together with some icing sugar, butter and vanilla extract.
cakes; Cupcakes; Cream Cheese
Saying Ciao
cakes; Cupcakes; Cream Cheese

Tuesday, June 23, 2009

Apricot Cheesecake Ripple

I bought a tray of lovely luscious golden apricots from the supermarket last night and made these yummy Apricot Cheesecake Ripple which was adapted from a recipe originally using plums.
The cake has a very nice caramel flavor coming from the dark muscovado sugar and a slight salty flavor from the creamcheese ripple. Once baked, the apricots were bursting with juice, was cottony soft and it felt like with each bite, tangy apricot conserve oozing into your mouth.
It would be a good idea after filling the tray to drop the tray a couple of times onto your table top to remove any trapped air bubbles. I did not do that as you can see from the picture below – two big holes in the cake.
Cakes,Fruits
Apricot Cheesecake Ripple
Ingredients:
250g cream cheese, softened at room temperature
1 tsp vanilla extract
3-3/4 tbsp sugar
5 eggs
220g butter, softened at room temperature
220g dark Muscovado sugar
250g plain flour
1-1/4 tsp baking powder
400g fresh Apricots, halved, stoned and diced
Method:
1) Preheat oven to 175 degree C.
2) Grease and line a 20x30cm lamington tray making sure the paper is extended about 5cm above the tray on all sides (this is to add removal of the cake after baking).
3) Cream the cheese, sugar, vanilla extract and 1-1/2 eggs together till smooth and free from lumps.
4) In another bowl, cream the butter and Muscovado sugar till creamy. Add the balance 3-1/2 eggs and continue creaming till light and fluffy.
5) Beat in the sifted flour and baking powder for approximately 2 minutes till well combined.
6) Spread half of the flour mixture onto the tray, dot with half the cream cheese mixture and scatter with half of the apricots.
7) Repeat with the balance flour mixture, cream cheese and top with the balance apricots.
8) Bake for 30-35 minutes in the centre of the oven till just firm to the touch. The cream cheese ripple will firm up further when cool, so do not overbake.

Monday, June 15, 2009

7-Up Bundt Cake

My brother bought this Kitchen Aid bundt pan for me quite a while back and, like the few other baking pans which he bought back from the US, they have yet to be used.

So yesterday, I googled for a Bundt recipe and I came across this 7-Up Bundt Cake which sounded very interesting and pardon the pun, refreshing too. All the reviews for this cake were good except some said it was sweet.
Photobucket
I made some adjustments to the sugar and also used a combination of plain flour and cake flour for this recipe. I also added lemon zest and some lemon juice abeit insufficient, to perk up the lemon-lime flavor of the 7-Up.

Even though the pan is non-stick, I gave it a good coat of baker's grease as I want to be sure the cake can be removed without any problem. Sticking is an inherent problem with Bundt cake pans due to the intricate designs.
Cakes
The cake was very soft and with tender crumbs. However, despite reducing the sugar, it still tasted sweet to me. The taste of 7-Up is not very apparent in the baked cake although you can still taste it faintly.
Photobucket
I will bake this cake again some other time however the sugar must be reduced further and more lemon juice added.

I am glad I did not make the icing sugar glace to drizzle over the cake otherwise the cake would taste even sweeter. I cannot however, resist the temptation of sifting a wee bit of snow sugar over the cake though.

7-UP BUNDT CAKE
(13 cup capacity bundt pan)

Ingredients:
425g butter
690g sugar
6-1/4 eggs
350g plain flour
120g cake flour
1 tsp baking powder
2 tsp lemon essence (or 1 tsp each of lemon and vanilla essence)
225ml 7-up
Juice from 1/2 a lemon
Zest from 1 lemon

Method:
1) Preheat oven to 165 degree C.
2) Grease Bundt pan very well making sure all the nooks and crannies are greased.
3) Cream butter and sugar till light and fluffy.
4) Add eggs, one at a time beating well after each addition.
5) Add the 7-Up to the lemon juice to make up 225ml, then add in the essence and zest.
6) Fold in the sifted flour alternating with the 7-Up to the creamed mixture.
7) Spoon mixture into the prepared pan and bake for 60-75 minutes.
8) Skewer test near the centre of the cake. Cake is ready when no crumbs stick to the skewer.

Baker's Grease:
Mix equare ratio of shortening, flour and vegetable oil into a smooth paste. Use this to grease the Bundt pan. Balance grease can be stored in an airtight container for future use.

Saturday, June 13, 2009

Milk Squares

This is one of those recipes which I copied a long time ago and in my 'to-do list'. Finally had the chance to make it last night.

Photobucket
This bread is kneaded and allowed to proof in the fridge overnight. I made the dough close to midnight yesterday and stayed up till around 2.30am for the 1st proofing while I finish up some office work. This morning, after returning the dough to room temperature, it was then shaped and cut into squares and given a final proofing before baking.

The first tray was spoilt because the oven temperature and timing indicated in the recipe was faulty. It stated to bake for 20 minutes at 230 degree C. Looking at the 4cm x 4.7cm cubes of bread, I decided to bake it at half the time. However even before the 10 minutes was up, all the milk square were baked to a burn. As I do not have the source for this recipe, I am unable to ascertain from the orginal blog if it was my mistake to copy the wrong baking temperature or if it was a genuine mistake of the original writer and if she has had the chance to update this error on her blog. Anyway, I lowered the temperature to 180 degree C and baked the second tray for 8 minutes and they turned out perfect.

The bread is soft, fluffy and mildy sweet. Just remember that the dough has eggs, milk powder and condensed milk in it. So please put it in the fridge for the overnight proofing. With our (Singapore) kind of hot weather, the rich dough can turn bad easily.
Bread
MILK SQUARES
Ingredients:
210gm bread flour
90g plain flour
3g baking powder
9g instant yeast
27g fine sugar
3g salt
75g condensed milk
9g milk powder
Half a beaten egg (approx 30g)
111g water
21g softened butter

Method:
1) Mix beaten egg, water and condensed milk together
2) Combine all dry ingredients together in a mixing bowl, add the liquid and knead for 9 minutes.
3) Add butter and continue kneading for a further 12 minutes or until not sticky.
4) Form into a ball. cover and let it proof for 1-2 hours or until double in size.
5) Knock out the air and shape into a ball. Place in an airtight container and leave in the fridge overnight.
6) Next morning, put the dough on a table, cover lightly with plastic wrap and let it return to room temperature (approx 30 - 40 minutes).
7) Knead lightly and shape/roll into a rectangle shape measuring 14cm x 28cm.
8) Cut into squares measuring 4cm x 4.7cm.
9) Place on a greased or parchment lined tray and proof for 20 minutes or till double in size.
10) Bake at 180 degree C for between 7 to 10 minutes till light brown.

Wednesday, June 03, 2009

Longans Muffins

A couple of weeks back, Dolly, my friend from Taiwan was in town on business. She brought me a box of lovely muffins and muah chee from Gui Yuan Cake(www.guiyuancake.com.tw). They are well known for their Dried Longan Muffins and have won several awards for them too. The shop takes its name after the dried longan which is called Gui Yuan in Chinese. Dolly mentioned that the Taiwanese believe that eating these muffins, especially during the colder months, has a warming effect on the body.

The muffins are choked with hydrated dried longans and chopped walnuts. The dark brown cake has a rich molass flavor and is moist though dense. Biting into one actually reminded me of eating a very fragrant Huat Kueh.

I did some googling and found a few recipes for this muffin and finally settled for one which I felt was a good representation of the ingredients and method I imagine.

Although the original recipe uses cake flour, I replaced that with top flour as I felt it would yield an even more superior product.
Photobucket
Come on, give this recipe a try and you will be enchanted by the taste of this dried longan muffins.

Longan Walnut Muffins
Ingredients
150g Top flour
2 tsp double-acting baking powder
1/2 tsp fine salt
110g dark brown sugar
70g dried longan
3/4 cup hot water
2 eggs
70gm butter, melted
1/2 tsp vanilla extract
1/2 cup longan water
75g walnuts, roasted and chopped coarsely

Method
1) Hydrate the dried longans in the 3/4 cup of hot water for 20-30 minutes. Strain the hydrated longans and squeeze lightly to remove excess water. Reserve 1/2 cup of the soaking liquid.
2) Sift top flour, salt and baking powder together.
3) Combine cooled longan water, melted butter and vanilla together
3) Whisk eggs and brown sugar till creamy. Add the butter/water mixture and whisk till just combined.
4) Fold in the flour lightly, add 50g of the chopped walnut and the dried longans.
5) Mix well and spoon batter into muffins/cupcake cases, top with the balance chopped walnuts.
6) Bake in a preheated oven at 180 degree C for 30-35 minutes for medium sized muffins and 20-25 minutes for mini muffins. Skewer test for doneness.

Note:
1) The batter is quite runny.
2) Pulverize your brown sugar if necessary to remove any big lumps.

Updated 6 June 09
I have corrected the walnuts to 75gms (50gms in batter + 25gms for garnishing. I had earlier indicated 150gms as I had doubled the recipe. Thousand apologies for the mistake.


Photobucket

Monday, May 25, 2009

Another Semolina Cake with Honey Citrus Syrup

Some weeks back, I made a Semolina Cake with Honey Citrus Syrup from a recipe found in the Australian Women's Weekly (AWW).
I had several requests for the recipe and I had promised to come back to the requester as soon as I can find the recipe. Unfortunately, I could not find the original recipe. I thought I had tore off the pages from the magazine and filed it away. No matter how many times I searched through the four arch files of recipes, I could not find it. I then started to search for the magazine hoping that perhaps, I have not torn out the recipes but I could not find it. DH who noticed me rumagging through the book shelves, drawers, coffee table and even the stack of old newspapers enquired what I was searching for. When I told him I was searching for that particular magazine he gave me a sheepish grin and said he remembered throwing it out. Grrrrrrrrrrrrrrh!

So what to do? I trawled the net hoping to find THE recipe but I had no luck finding it. I even wrote to AWW in the hope they will send me the recipe (and I am still waiting hopefully).

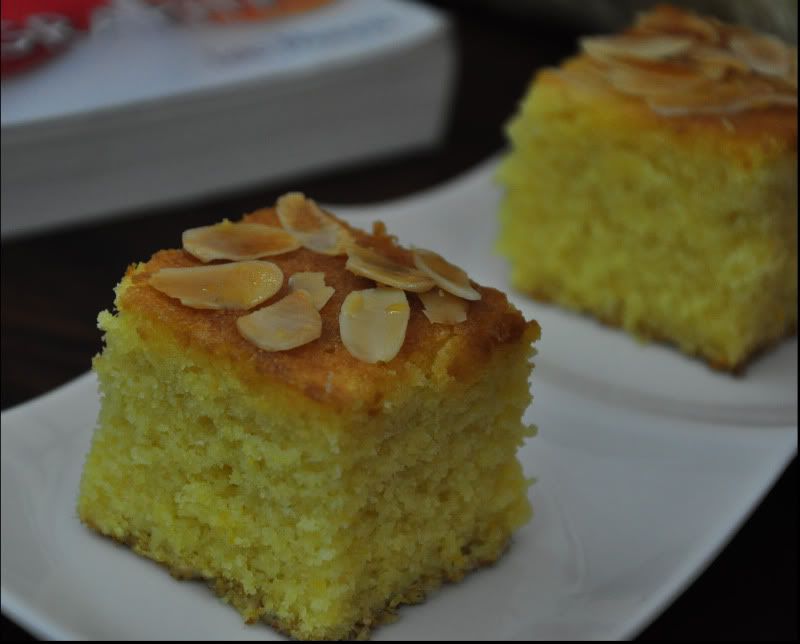
Anyway, something good did turn out from the internet trawling. I found another variation of this cake that looks quite promising. The fact that it uses separated egg yolks and whisked stiffened eggwhites tell me that this would be an even lighter cake than the original one. So yesterday, I test-kitchened this version and the result did not disappoint. In fact, this second cake tastes much better than the first as it has dessicated coconut and marmalade added to it. So before I start to loose this recipe as well, I am quickly posting it here.

I hope this recipe will do for the few ladies who wrote to me for the original recipe.

Photobucket
Honey Citrus Semolina Cake II
Ingredients:
6 eggs, separated
100g sugar
100g dessicated coconut (I used 75g)
140g flour
270g semolina
25g ground almonds (I used 50g)
20g baking powder
240ml cornoil or canola oil
300ml freshly squeezed orange juice
60ml lemon juice
1 teaspoon each grated orange and lemon zest
240ml orange marmalade

Honey Citrus Syrup
3/4 cup sugar
2 tbsp honey
1/2 cup water
1/2 cup orange juice
1/4 cup lemon juice
(You can use 3/4 cup orange juice and omit the lemon juice but I prefer a mixture of orange and lemon juice)

Method:
1) Heat oven to 180 degree C
2) Grease and line a lamington panwith parchment paper making sure the paper extend 3cm above the pan.
3) Sift flour and baking powder together. Add in the coconut, ground almonds and semolina and stir to combine well.
4) Mix oil, beaten yolks, marmalade, juices and zest together. Stir in the dry ingredients.
5) Meantime, whisk egg whites and sugar till stiff peaks form.
6) Fold the egg white to the flour mixture taking care not to deflate the egg whites too much.
7) Pour mixture into the prepared tin and sprinkle with some almonds slivers if desired.
8) Bake for 30 minutes or until a toothpick inserted in the middle comes out clean with no sticky crumbs.
() While cake is baking, prepare the syrup by boiling the liquid till it is reduced to slightly more than half a cup.
9) Pour hot syrup over the cake the moment you remove the cake from the oven. Cool in the pan. Cut and serve.

Pumpkin Ginger-Nut Muffins

Remember after last week's pumpkin mee suah cake I had this piece of pumpkin leftover? Well I made some Pumpkin Ginger-Nut Muffins a couple of days after that. I did not know what to expect of the final results as I was either short of this or short of that. After steaming whatever pumpkin I had, I realized that it yielded only one third cup of puree instead of the required one cup. I did not have plain flour and so substituted it with half-and-half of cake flour and self-rising flour plus another half teaspoon of baking powder. I have no ground nutmeg and so used only the allspice, cinnamon and ground ginger. And perhaps due to the shortage of mashed pumpkin, the mixture turned out very dry. I then added 75ml of unsweetened soya milk to loosen up the mixture. The muffins turned out super nice though! They smelt heavenly and the texture was just nice with a nice crunch coming from the chopped roasted walnuts and candied ginger. It was especially good eaten warm and just as good when cold. Best of all, they remained soft and moist even after 24 hours.

Photobucket

Pumpkin Ginger-Nut Muffins
Ingredients:
1-1/2 cups flour (3/4cup ea of cake flour + self-rising flour + 1/2tsp baking powder)
1/2 teaspoon of salt
1 cup sugar
1 teaspoon baking soda
1 cup cooked pumpkin purée (1/3 cup)
1/3 cup melted butter
2 eggs, beaten
1/4 cup water (plus 75ml unsweetened soya milk, if needed)
1/2 teaspoon nutmeg (I did not have this)
1/2 teaspoon cinnamon
1/2 teaspoon allspice
1 teaspoon ground ginger
1 cup chopped toasted walnuts or pecans (I used pecans)
2 Tbsp well chopped candied ginger
Method:
1) Preheat oven to 175°C.
2) Sift the flours, baking soda, baking powder and spices together. Stir in the sugar, chopped nuts and ginger and mix throughly.
3) Mix the pumpkin, melted butter, eggs and water together. Stir well to disperse the mashed pumpkin and then combine with the dry ingredients until just incorporated. Do not over-mix. If the mixture looks dry at this point of time, then stir in the soya milk.
4) Spoon mixture into a prepared muffin cups and bake for 25-30 minutes.
5) Check for doneness by inserting a skewer into the center of a muffin. If it comes out clean, it is done.
6) Cool on a rack.
Note: Ingredients in brackets are the changes made by me.

Sunday, May 17, 2009

Pumpkin Mee Suah Kueh

Made this savoury Pumpkin Mee Suah Kueh for Saturday's breakfast. This is about the third or fourth time that I have made this. The first was in this earlier posting in August 2007.

This time around, I added some five spice powder to the pumpkin-pork mixture to give the kueh a better fragrance.

Photobucket
Now I am wondering what to do with the leftover piece of pumpkin sitting in my fridge??!!