Sunday, May 10, 2009

Orh Ku Kueh

To translate directly from Hokkiean dialect, 'Ku' means tortoise whilst 'Kueh' means cakes. The Ku Kuehs comes in a myraid of colors:- Purple, Green, Yellow and the very popular Red. The cake is shaped like a tortoise and therefore Ku. The 'Ang'(Red) Ku Kuehs are commonly used during celebrations like weddings, baby's full month and birthdays to signify longevity as tortoise are known to live till a ripe old age. The purple, green and yellow are the more 'modern' creations in the recent years with purple yam, pandanus juice added to give the skin the distinctive purple and green. They are usually filled with a sweet filling of mashed mung beans or peanuts. The Yellow Ku Kueh are usually filled with sweet mung beans to which mashed durian flesh has been added.

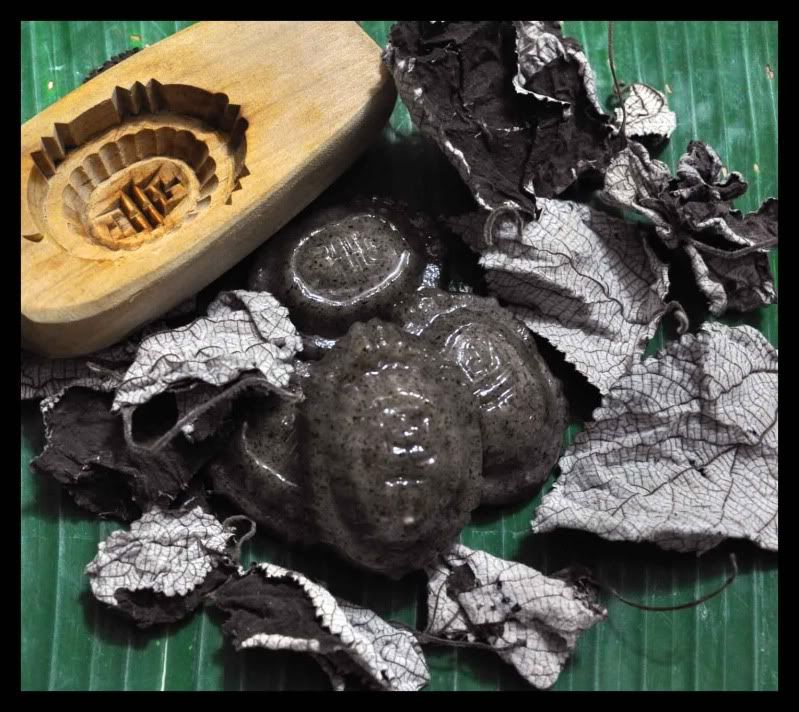
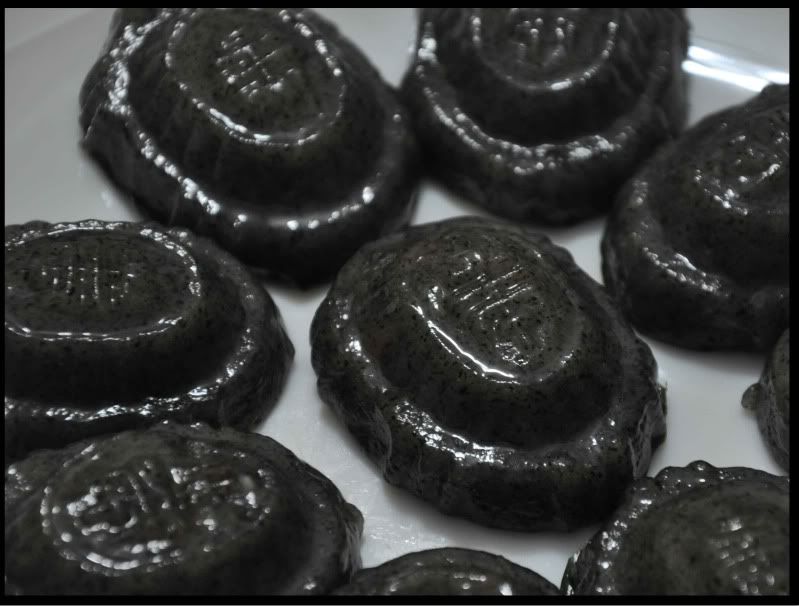
The mini Kus, each measuring 6cm long and 4.2cm across.
Photobucket

Photobucket
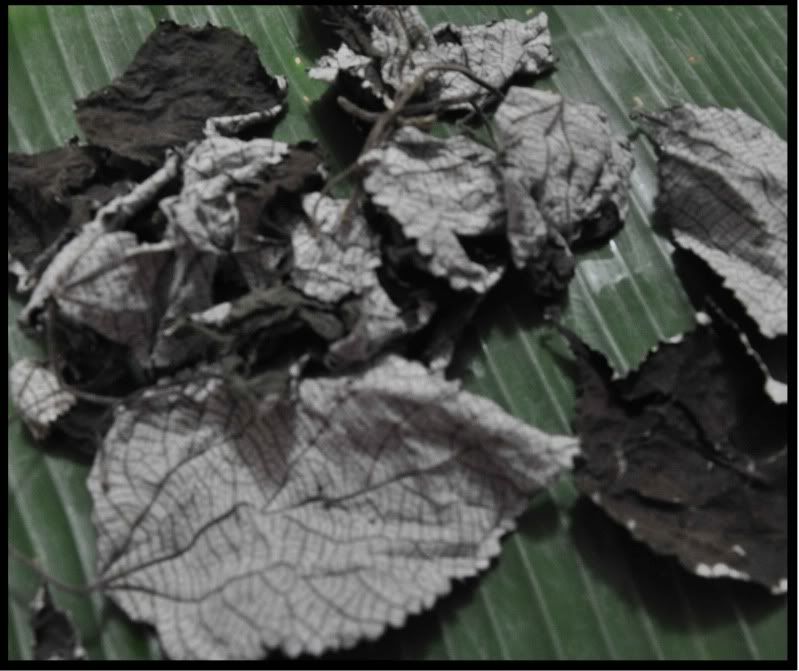
The 'Orh' (Black) Ku Kueh or Black Tortoise Cake which I have here could have been a Hakka snack. I am just guessing as these black ku kueh gets it black hue from the leaves of the Rami, Choy Yip or Mugworts plant. These leaves are favored by the Hakkas and widely used in their traditional cakes to give them their distinctive black and I believe, for their medicinal properties too!

Anyway,this is the second time that I have attempted this kueh and the skin is much softer than the first attempt which was more chewy. I had added a spoon of rice flour to reduce the chewiness that comes from a skin made with 100% glutinous rice flour. Some recipes for the sweet Kus has mashed sweet potatoes or yam added to give the skin a softer bite while retaining the chewiness.

These black Kus are different from the usual Red, Purple, Yellow or Green Kus as it uses a savoury fillings of chai por (preserved radish) and minced pork which is fried till fragrant and then given a kick with liberal doses of white pepper. The skin however is sweet. In fact, the skin is much sweeter than the sweet ku kuehs. I suppose this is tactical to give the snack an interesting balance of taste from the salty preserved radish.

Fresh or dried, tt is quite difficult to find mugwort leaves here in Singapore. I got the dried leaves shown here from Johor Bahru. The fresh leaves are even more difficult to come by unless you are living in areas where there is a large community of Hakkas.
Photobucket

Traditional Black Angku

Filings:
100g minced chai poh, soaked to remove excess salt
100g minced pork

Seasonings:
1/2 tsp sugar
1 tsp dark soy sauce
1/2 tsp pepper

Marinade:
1/4tsp salt
1 tsp soy sauce
1/2 tsp sesame oil

1) Mix the marinade with the pork and leave in the fridge for one hour.
2) Heat a work with a little oil and saute chai poh till fragrant, then add the minced pork and seasonings. Drizzle in a little water and stir fry well. Dish up and cool.

Skin:
150g choh yip/fresh rami leaves
130g caster sugar
200g glutinous rice flour
25ml cooking oil
125-150ml water

Glazing:
2 tbsp pre-cooked oil

Banana leaves cut into shapes slightly bigger than the mould you intend to use. Brush leaves with oil.

Method:
1) Wash the rami leaves and boil with water for 30 minutes. Remove, drain off excess water and leave aside to cool before blending into a paste.
2) Place the glutinuous flour into a mixing bowl.
3) Boil the water and sugar till melted. Add in the paste and stir to distribute the paste.
4) Pour the hot syrup into the glutinous flour and quickly stir into a dough.
5) Place the hot dough onto a clean table, add the oil and knead till you get a smooth and shiny dough.
6) Scale dough into pieces and roll into ball.
7) Flatten each piece and wrap with the fillings, seal the edges and roll into a ball.
8) Dust with extra glutinous flour before placing into the mould. Press the ball into the mould with your palm and knock the mould to dislodge the kueh. Place on a greased banana leaf.
9) Steam over low flame for five minutes, uncover steamer cover, glaze kueh with cooked oil, Cover and steam for another 2 minutes.

Note:
The original recipe suggested to 'wash' off the excess glutinuous flour from the shaped kueh under a tap (slow water). I did not do it as I use minimal flour to dust the kueh.
As I mentioned, I added some rice flour for a softer skin. What I did was to remove 1/2 tbsp of glutinuous flour and replace with 1/2 tbsp of rice flour.
I used 10gms of dried choh yip which has been soaked overnight to soften before boiling. I cut off the hard stems before weighing the leaves and also to avoid having hards bits of stems in the skin.
You may wish to reduce the sugar for the skin, I find it too sweet.
Wednesday, May 06, 2009

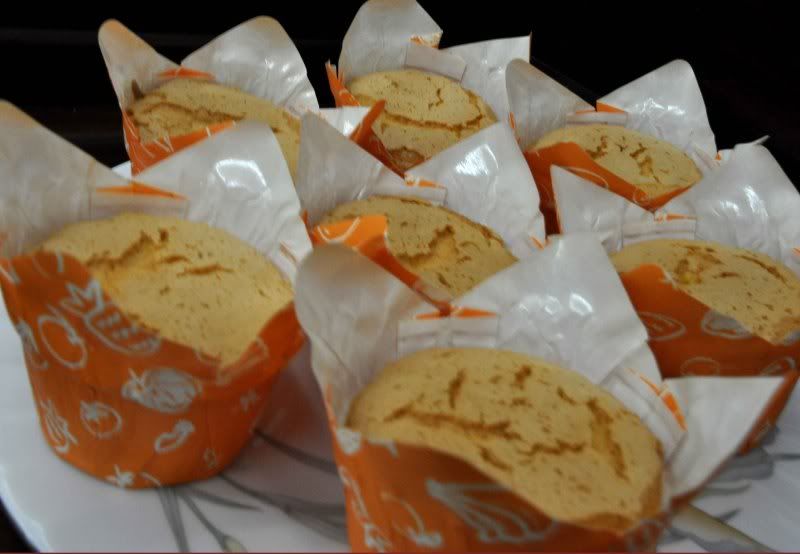
Featherlight Sponge Cupcakes

I bought these pretty cake cases some time back and I had entirely forgotten about them until last week when I was looking for some cake cases to put the Chocolate Mayonnaise Cakes.

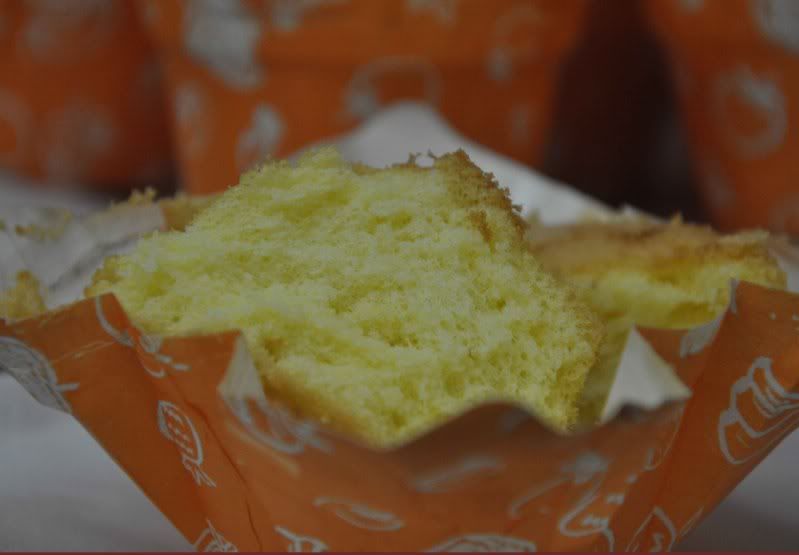
As the cases are rather big, I decided against making muffin as I have never like them baked jumbo-sized. A featherlight sponge would be ideal as you can finish the whole cupcake and yet not feel stuffed.

They turned out pretty nice and I love how the cakes can be removed so cleanly without sticking to the insides of the cases.

Photobucket

A slight tug at the corners and the case unfolds easily to reveal the cake.
Photobucket

If the photos seemed a bit blurry, well you are right! I bought a new cammy, a Nikon D90 over the weekend and I am still struggling with the instruction manual and learning how to use it. So until I master how to select the correct aperture, shutter speed and ISO settings, be prepared for more out-of-focused pictures.

Saturday, May 02, 2009

Chocolate Cake with a Difference

This is one of my favorite chocolate cake. It is a cinch to make. No mixer is required and once all the ingredients are measured, it takes just a stir with a hand whisk and the cake is ready to be baked in two minutes flat.

What I love about this chocolate cake is that it is very soft and moist although no egg or butter is used. The secret to the softness and moistness comes from the mayonnaise and buttermilk. It may sound gross as you will hardly associate mayo with cakes but this is truly one cake which you have to try to believe how wonderfully the ingredients meld together to give you a chocolate cake with a difference.


For a more luxurious treat, frost the cake with a chocolate ganache.

MAYONNAISE CHOCOLATE CAKE
Ingredients:
110g mayonnaise
125ml buttermilk
1 tsp vanilla essence
120g all-purpose plain flour
20g cocoa powder
1-1/2 tsp bicarbonate soda
110g sugar

Method:
1) Line a 7" square baking tin with parchment paper (no need to grease).
2) Sift flour, cocoa and bicarbonate soda together.
3) Place the sugar and sifted flour mixture into a bowl.
4) In a separate bowl, mix the mayo, vanilla essence and buttermilk till smooth.
5) Add mayo mixture to the flour and mix till the batter is smooth.
6) Pour mixture into prepared pan and bake at 170 deg C for 20-25 minutes.

Note:
a) If you have no buttermilk, you can add 1-1/2 tsp of lemon juice to a glass of milk to make up to 125ml.
b) For a taller cake, make 1.5 times the recipe above and bake 40 minutes.

Tuesday, April 14, 2009

Lychee Martini Cake

Made this Lychee Martini Cake on Sunday in celebration of my son's 24th birthday. His birthday is actually today and because it also coincides with the first of his six exam papers, we then decide to have an early celebration for him.

I do not have the actual recipe for the Lychee Martini Cake but having tasted a slice of it late last year, I set out to create my own version of the cake.

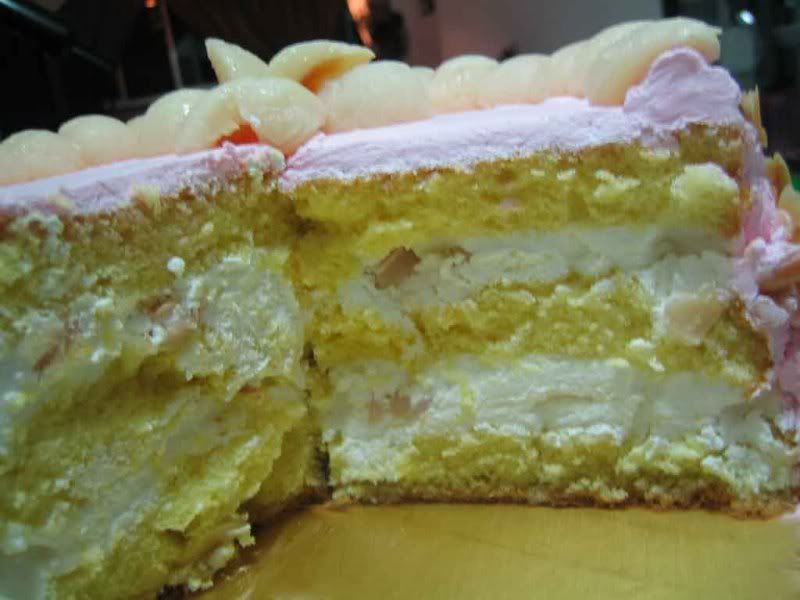
I soaked some well drained, diced canned lychees overnight in a mixture of Lychee Liquer, Vodka and Limoncello. The 9-inch sponge cake was torted and each layer brushed with a syrup that has been laced with more Lychee Liquer and Vodka. It is then assembled with a filling of whipped cream and the 'drunkard' lychees.

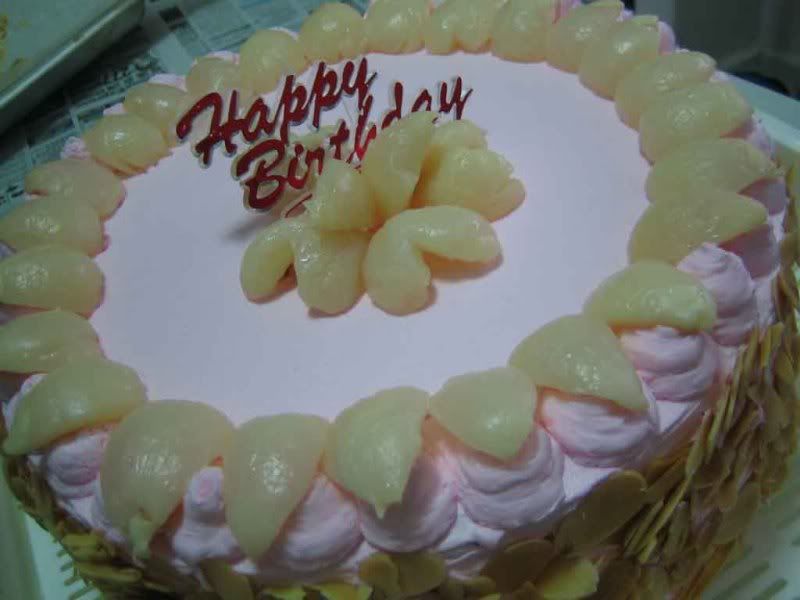
The whole cake is then covered in whipped cream with toasted almond slivers on the sides. I did make a mistake of using the wrong shade of pink for the icing. I had wanted to simulate the very light pink/ivory color of the lychee fruit. The end result was a much brighter pink that would be more suited for a girl recipient than a guy.

So here is my Pink Lychee Martini Cake.
Photobucket
The insides.
Photobucket

This morning, I participated in a contest organized by the radio station Class95 . In the past couple of weeks during the Morning Express program, listeners are encouraged to SMS in birthday greetings to people they know who are celebrating their birthday on that particular day. The prize each day is a birthday cake sponsored by Bakerzin, . You guess right! I participated in this SMS contest and this is the cake which I won for my son. Bakerzin has been very generous to allow the winner to select whichever cake that is available at the outlet and you are even free to choose whichever size you want.

I chose the Ambroisa, a heavenly confection of crunchy walnut dacquoise with Jivara chocolate ganache and nuggets of caramelised bananas.

A big Thank You to Bakerzin and the Morning Express Show for selecting my entry.

Another yummy treat for the birthday boy.
Photobucket
Photobucket

Tuesday, April 07, 2009

Hits and Misses

Over the last few weeks, I have had some hits and misses. Actually more miss than hits.

The first miss was the Japanese Soft Cheesecake. I had wanted to bake this for the longest time but never really got round to doing it for fear of failure. I have heard so many 'horror' stories like the cake collapsing the moment it came out of the oven or even midway through baking and also the texture being very dense and heavy. Hearing all these make me nervous to even attempt it until two weeks ago. I was so careful to follow the recipe to the T (or so I thought). After popping the cake into the oven, I started to clear the tabletop and lo and behold, tucked behind the jar of sugar was the little plastic bag of cornstarch that I had measured out but forgotten to add to the batter. For a second or two, I was debating whether to just leave the cake as it was or to remove the pan and dump everything into the bin. What the heck! I then decided to just pour the batter back into the mixer and give it a quick whisk with the cornstarch. By then, the egg white which I had so nicely whisked up were all deflated. I just poured the batter back into the pan, slam the oven door shut and twiddle my thumbs and hope for the best.

This was how the cake #1 turned out.
Photobucket
Photobucket

Feeling extremely angry with myself, I attempted the cheesecake again the next evening. This time, fearful that I will leave some ingredients 'hidden' away, I place everything in full view.

This is cake #2.
Photobucket
Photobucket

Honestly if you asked me, I preferred the texture from cake #1 which is closer to the ones sold in the bakeries. Cake #2 was way too light and it felt too 'airy' in the mouth.

The second miss was the Hongkong Smiling Paus. Recently two bloggers had tried with great success the recipe posted by me in 2006 at a cooking forum. Their positive feedback to me prompted me to make some myself. It turned out a disaster. I had failed my own recipe. The Paus did not 'smile' at all. In fact they were rather dismal looking. Fortunately, I had only wrapped and filled six paus and then to do a test steaming. I threw away the rest of the dough as I did not want to waste the beautiful char siew fillings on the sad looking paus.
Photobucket

An hour later (and still feeling angry), I mix up a batch of oil and water dough to make the baked Siew Paus. They were terribly difficult to wrap. Despite being careful not let any of the fillings come into contact with the sealing edges of the pau skin, the shaped paus kept popping open the moment I put them on the baking tray. I managed only a few nice ones. I placed those that insisted on popping open into disposable muffin cups to bake.

Photobucket
Photobucket

Ugly looks aside, they were really good. The skin was crispy yet melt-in-the mouth and the fillings juicy.

The only hit I had was this Semolina Cake with Honey Citrus Syrup. Semolina cakes are known to be quite dry. However, this cake is really good. Honey, lemon and blood orange juice is boiled till syrupy. This is then drenched over the cake the moment it came out of the oven. The syrup helps to keep the cake moist without being soggy.

Semolina Cake with Honey Citrus Syrup topped with dried figs.
Photobucket
Photobucket

Wednesday, March 18, 2009

C is for Crabsticks

C is also for chiffons. Two chiffons in fact.

Baked two chiffons tonight. The darker colored cake is a Cheese Chiffon whilst the lighter colored one is a Crabstick Chiffon.
Photobucket

I am really surprised how light and fluffy these two cakes are as they were baked using normal plain flour for the Cheese Chiffon and self-rising flour for the Crabstick Chiffon. I remembered back in the 70s, when chiffon cakes were in vogue, the only flour used to make them was the SoftasSilk flour. This is equivalent to the top flour used in baking nowadays. The SoftasSilk flour disappeared from the supermarket shelves in the 90s and even now, you can only find them only in a few selected supermarket outlets.

Crabstick Chiffon - speckled with shredded crabsticks or crab filament sticks.
Photobucket

Cheese Chiffon - I had used a mixture of cheese slices and edam cheese to add more flavor.
Photobucket

Saturday, March 14, 2009

On a Whim and a Fancy

I return from dinner this evening feeling dead tired as I was nursing a slight flu and sorethroat.

A good sleep would do me good actually. Instead, I took out some recipe books and started flipping through them aimlessly until I came to this Yoghurt Apple Buttercake. Looks tempting enough except that I do not have any apples at home. The urge to bake this cake was strong. So inspite of the grogginess from the flu medication, I started to measure out the ingredients.

In place of the apples, I used diced dried mangoes which have been reconstituted in some hot water to soften them.

This is my version of Mango Yoghurt Buttercake.

Photobucket
Ingredients:
100g dried mangoes,
250g butter
230g caster sugar
5 eggs
120ml yoghurt
315g flour
1 tsp baking powder
1/3tsp bicarbonate soda
1 tsp vanilla essence

Method:
1) Preheat oven to 175 degree C.
2) Dice the dried mangoes and reconstitute with 2 tbsp of very hot water to soften.
3) Sift flour, baking powder and bicarbonate soda together.
4) Cream the butter and sugar till fluffy.
5) Beat in the egg, one at a time, and cream till smooth and light.
6) Mis in the yoghurt and flour alternately and finally add in the mangoes.
7) Pour into a greased and lined 9" round tin and bake for 60 minutes or till a skewer inserted in the middle comes out clean.
8) Cool cake in tin for 10 minutes before removing to a rack to continue the cooling.

Note: I baked mine in three disposable paper trays for 35 minutes.

Photobucket

Sunday, March 08, 2009

Semla - The Swedish 'King Killer'

A month ago, I was driving to work one early morning when I received an SMS from Joanna. She had just queued at Ikea for this Swedish bun and she was having this over the moon satisfaction after eating it. Having lived in Sweden for a while, she really misses this bun big time. I called her and we had a good fifteen minute conversation about Semla, a cardamon spiced bread that has a creamy almond filling and whipped cream topping. I was so entralled by her description of it that I wished I was driving to Ikea and not to work. I have never visited Sweden before, must less heard of this bun and good ole Jo aroused enough curiosity in me to do some googling.

The Semla, originated in Sweden as far back as the 16th Century and it is usually eaten on the last day before Easter fasting starts. As the fasting could last as long as 40 days, the Swedes would indulged in a super rich feast which is topped off with the Semla.

I managed to google for the recipe which looks easy enough. However, not having seen nor tasted the real thing, I really did not know what to expect. I then made a trip to Ikea, where this special treat is sold at their restaurant for a limited period. The bun cost S$3.50 each. Pricey I would say. The bun was light and fluffy. The cardamon nuance was not overpowering and the almond fillings was smooth and creamy. My only grouse is that they are stingy with the fillings. It would have tasted better, in my opinion, if there were more of the fragrant almond paste.

So having tasted the real McCoy, I attempted the Semla today.

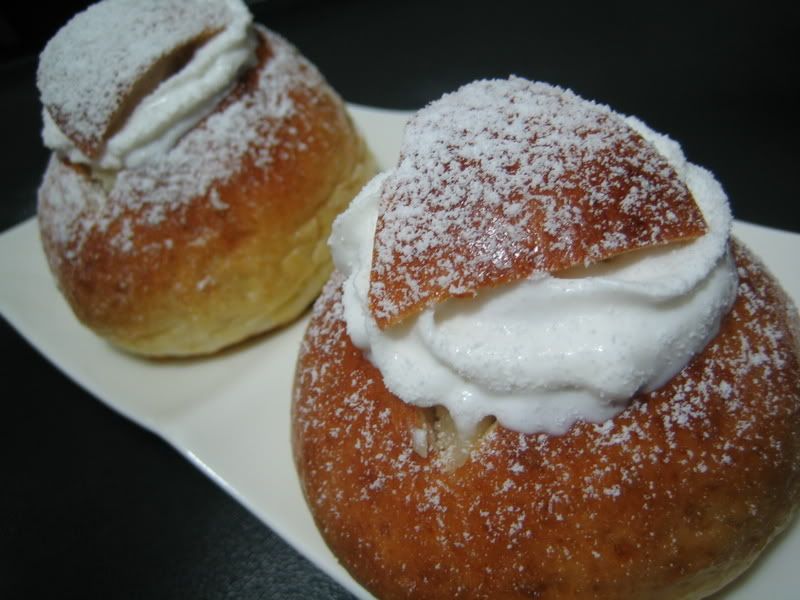
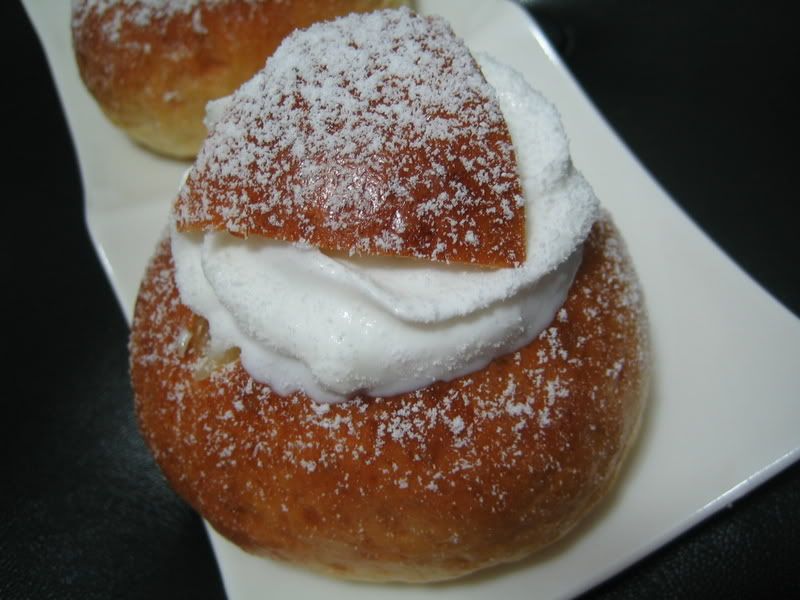
A triangular piece is cut off the top of the bun and the insides hollowed out to be filled with the almond paste. The lid is replaced on a ring of whipped cream and then dusted with snow sugar.
Semla

Semla

A cut-up viewed of the Semla
Semla-Inside

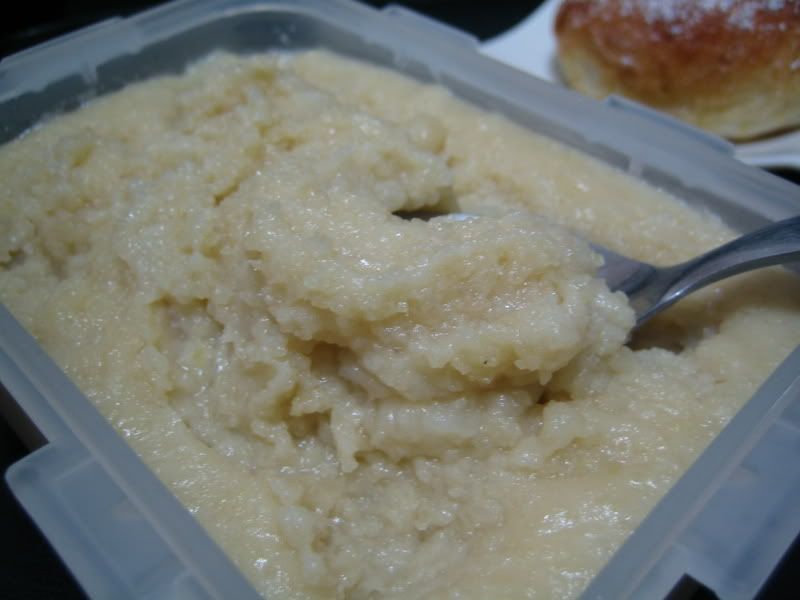
The Semla fillings, made with ground almonds, sugar, thickend cream and mashed potatoes.
Semla-Fillings

Oh, if you are wondering why the Semla is a King Killer, it was said that on 12 February, 1771, Swedish King Adolf Frederick, had consumed a huge feast of seafood and champangne. After that, he had topped off the meal with 14 servings of Semla as this was his favorite dessert. He later died of stroke that day. What a way to go!

For those interested to try this, here is the recipe:

SEMLA

Ingredients:
70gms butter
1 cup milk
11gms instant yeast
Pinch of salt
80gms sugar
380gms plain flour
1 tsp ground cardamom
1 egg, beaten (for glazing)
Whipped cream for decoration
Icing sugar or snow sugar for dusting

Fillings:
200gms ground almonds
55gms icing sugar
100gms fine sugar
250gms mashed potatoes (use the fluffly Russet Burbanks)
2 tbsp coffee creamer powder
120 – 150ml cream
1 tsp almond essence

Method:
1) Melt butter in a small saucepan, add milk and heat till lukewarm.
2) Mix a small amount of the milk mixture with the yeast into a paste before mixing it well with the balance of the milk.
3) Remove approx 2 tbsp of the flour to be used for dusting the table and add the balance flour to the yeast-milk mixture.
4) Knead dough will smooth and shiny. Form into a ball and proof in a covered bowl for 40 minutes.
5) Punch down and shape into 50gm ball and place on baking tray to proof for a further 30 minutes.
6) Glaze with beaten egg and bake in a preheated oven at 250degC for 10 minutes.
7)Leave to cool on a rack.

Fillings:
1) Combine all ingredients for fillings together.

To Serve the Semla:
1) Just before eating, cut a triangular flap from the top of the bread. Hollow out the bread.
2) Fill with the almond fillings.
3) Pipe a ring of whipped cream around the hole.
4)Replace with the lid and dust with icing sugar.


Note:
a) You may wish to halve the ingredients for the fillings as this recipe yields quite a big portion.
b) The bread recipe is the actual one which I goOgled online. I found that it hardens substantially by the next morning and was not as fluffly. I would suggest you just use your own favorite soft (sweet) bread recipe but add a some ground cardamom to it.
c) I use canned Nestle sterilized cream for this. The amount of cream used would depend on how ‘wet’ your mashed potato is.

Wednesday, February 04, 2009

Happy Niu(Ox) Year

Gong Xi Fa Cai.

The days really flew and we are already into the 10th day of the Ox Year. Just wanted to share in this post, what I have been up to in baking and cooking for this new year.

I managed to make three kinds of cookies this year. The first, Blossoms Pineapple Tarts as I made the tarts into pretty little flower shapes. These tarts are actually Nastar, the Indonesian version which uses grated Edam cheese in the pastry. I love the subtle taste of cheese in the buttery melt-in-the mouth pastry. Paired with the tangy pineapple jam, the tarts are a sure winner amongst the many bottles of cookies jostling for attention.

Blossoms Pineapple Tarts

I also made some Hearts of Roses. Again, the name which I coined myself will give you a hint of what is to be expected. Using a trusted shortbread cookie recipe, I added pulverised dried rose buds to the dough. The idea to make this is not original I must admit. I was out at the mall doing my bit of new year shopping and had stopped by a cookie kiosk. The array of cookies offered by this vendor is mind boggling. They had unique flavors like Japanese Sweet Potato, Jackfruit, Lychee, Champagne Raisin, Black Cookies which is made with soya and sunflower seeds to the commoner ones like Green Bean, Durian, Cashews, Almonds and Pistachios. The Rose Tea Cookies was one of those which I sampled and I loved how the light rose fragrance perfumed the cookies. Not wanting to splurge $23.80 on a tin of 72 cookies, I decided I could easily make them myself. Besides adding pulverised rose buds, I added rose syrup which I happened to have half a bottle in the larder and decorated the cookies with a sprinkling of pink sugar crystal. For less than $10, I ended up with three and half bottles of Hearts of Roses.
Photobucket

The last cookie I made were Cranberry Cookies, the recipe of which I goggled off the internet. Nothing spectacular about this drop cookie except that it has a bit of chewiness in it as the cranberries were blended rendering it into something like gummies.

I also made some Pickled Lotus Roots. The paper thin slices of lotus roots are pickled in a vinegar sugar syrup and given a spicy kick with the addition of fiery birdeye chillies and liquorice strips. Served cold, this pickle really refreshes the palate. Everyone needs to eat something like this with all the gorging and bingeing.

Photobucket

Pre-Reunion
I don't usually prepare Reunion Dinner in my own home as DH prefers to just have the yearly Do at his mum's home. However, this year, I did make an auspicious pig trotter, albeit German style, pre-reunion dinner. We Chinese believe that having pig trotters during new year period will bring in lots of luck and money. The usual way to serve the trotter would be to braise it in soya sauce. Instead of braising, I prefer to roast it and hence, Golden Roasted German Pork Knuckle, served with whole grain mustard and relish. The crackling were meltingly good and the meat just nicely cooked. Yum.

Pork Knuckle just roasted
Photobucket

Plated to be served
Photobucket

Succulent, yummy
Photobucket

I also made this rich soup of pork bones, dried cuttlefish, scallops, leeks and Winter Bamboo Shoots. The Bamboo Shoots here is the star ingredient. A good friend had actually couried the Bamboo Shoots to me, all the way from Taichung, Taiwan. I don't usually take bamboo shoots as they sometimes have this strange ammonia smell that is not unlike, pardon me, urine. However these winter shoots are so different, they are so tender and they do made the soup so umami sweet tasting. I can imagine how stomach warming this soup can be on a cold wintery night if I was in a cold county. With her instructions over the phone, she suggested the ingredients to be used and the 'Mother-in-Law's lesson" on how to prepare the fresh shoots. It seems that in Taiwan, any Mother-in-Law worth her salt would remind their new daughter that bamboo shoots must be cooked over rolling boiling water, uncovered, for the first 15 minutes of the cooking time. This is to ensure that the shoots will taste its best and retains the crunchiness. By the way, Winter Bamboo Shoots are a prized ingredient in Taiwan.

Here is my Pork Ribs Winter Bamboo Shoot Soup
Photobucket

First Day of CNY
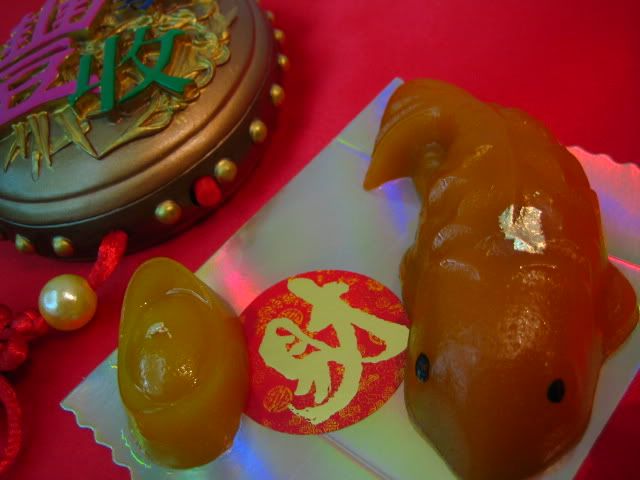
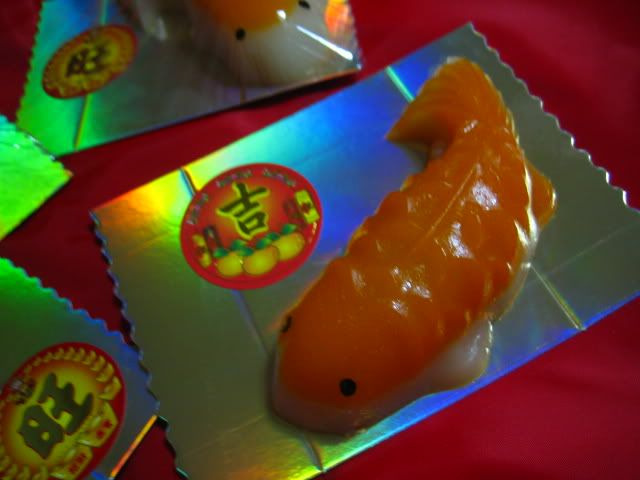
For the obligatory rounds of Pai Nien(拜年), I had made these delightful mini Fish and Gold Ingots Nien Gao (年糕) to be given away with the pair of Mandarin Oranges. These steamed glutinuous sweet cakes were given a luxurious touch with gold foil. I must have made close to 150 of these mini fishes in total. Some were given to my colleagues and my husband's colleagues just prior to the new year while the rest were given away on the first day of new year. Although tiny, the fishes were well received by all as Nien Gao literally translate to mean Year (Nien), High (Gao) and eating them will assure one of a job promotion every year for the working adults and high grades for the school kids. It is also traditionally offered to the Kitchen God as prayer food to 'seal' his mouth with the sweet sticky cakes so that he will not carry a bad report but only sweet stuff of you when he makes his yearly report to the Jade Emperor.

Fishes Galore
Photobucket
Photobucket
Photobucket

Second Day of CNY
This is my cookout day. I will usually invite my in-laws (from my husband's side) and my children's friends home for dinner on the second day. This year, I had prepared an eight course buffet style dinner for the close to fifty guests. My Prosperity Menu includes: Imperial Herbal Steamed Chicken, Wasabi-Mayo Prawns, Mongolian Pork Ribs, Steamed Wong Bok with Scallops in Superior Stock, Saute Pork Slices with Black Pepper, Braised Mushroom & Dried Oysters in Black Moss, Fried Brown Rice Vermicelli and Mini Fruit Tartletts. All these are in addition to the assortment of traditional cakes and cookies served.

The Properity Menu -I made a menu so that my guests could see for themselves what would be served for dinner.
Photobucket

Mongolian Ribs - marinated in red fermented bean curd for three days, deep fried and the tossed in a cheese sauce.
Photobucket

Imperial Herbal Chicken - three pots of fresh chicken thigh, steamed with herbs and Shao Xing wine.
Photobucket

Steamed WongBok smoothered in a sauce made with superior stock and dried scallops.
Photobucket

The Black Pepper Pork Slices - tender slices of pork,fried with large onions and black pepper.
Photobucket

A perennial favorite, Braised Mushrooms & Dried Oysters with Black Moss.
Photobucket

Wasbi-Mayo Prawns - lightly battered prawns served with the wasabi-laced mayo sauce on the side.
Photobucket

Fried Brown Rice Vermicelli with julienned vegetables - for the carbo-deprived.
Photobucket

Mini Fruit Tartletts - cocktails over custard
Photobucket

The Dessert Tray = more cakes for the sweet toothed!
Photobucket

Tuesday, February 03, 2009

Celphy is One

Photobucket

Aunty Ginny, can you help my friend make a birthday cake for her daughter's 1st birthday. Wtihout thinking, I said Yes to Tricia, a neighbour of my brother's.

I did not think twice about making this cake as it has been quite a long time since I last made a fondant cake.

Photobucket
It was to be a two-tiered cake with the name C-E-L-P=H-Y spelt out on the top tier and MY 1ST BIRTHDAY on the lower tier.

Photobucket
I made a cranberry buttercake with a tangy orange curd fillings for the lower tier and a chocolate cherry cake with chocolate cream cheese fillings for the top tier.

Making this cake was a bit 'stressful' for me but not in a bad way though. As it is still within the lunar new year period, it was a challenge to juggle the many visitations, work, the sugarpaste and marshmallow fondant preparation and with the pre-molding of the flowers and alphabets.

I was told little Celphy loves Elmo. I thought I could mould Elmo from sugarpaste to be used as a cake topper. As this is my first attempt to mould cartoon figurines I was pretty panicky when it did not turn out the way I wanted it to. In fact my daughter commented that my Elmo looks constipated.
Photobucket

In the end, I bought a set of the Wilton Sesame Street cake toppers to be used instead. (The little hole you see in the middle here is where the centre dowel was driven in to hold the two tiers in place. It will be covered up when the '1st' candle is positioned over it.)
Photobucket
I had no particular design or theme in mind but just let whatever ideas that comes along lead the way as I decorated the cake in marshmallow fondant.

Photobucket
I am pretty pleased with the end result and I was happy that the cake was much prettier than what Tricia and Celphy's mum had expected.

Oh, and this is the side order of cupcakes which Celphy's mum ordered as well.

Photobucket

Photobucket

Photobucket