Some weeks back, I made a Semolina Cake with Honey Citrus Syrup from a recipe found in the Australian Women's Weekly (AWW).
I had several requests for the recipe and I had promised to come back to the requester as soon as I can find the recipe. Unfortunately, I could not find the original recipe. I thought I had tore off the pages from the magazine and filed it away. No matter how many times I searched through the four arch files of recipes, I could not find it. I then started to search for the magazine hoping that perhaps, I have not torn out the recipes but I could not find it. DH who noticed me rumagging through the book shelves, drawers, coffee table and even the stack of old newspapers enquired what I was searching for. When I told him I was searching for that particular magazine he gave me a sheepish grin and said he remembered throwing it out. Grrrrrrrrrrrrrrh!
So what to do? I trawled the net hoping to find THE recipe but I had no luck finding it. I even wrote to AWW in the hope they will send me the recipe (and I am still waiting hopefully).
Anyway, something good did turn out from the internet trawling. I found another variation of this cake that looks quite promising. The fact that it uses separated egg yolks and whisked stiffened eggwhites tell me that this would be an even lighter cake than the original one. So yesterday, I test-kitchened this version and the result did not disappoint. In fact, this second cake tastes much better than the first as it has dessicated coconut and marmalade added to it. So before I start to loose this recipe as well, I am quickly posting it here.
I hope this recipe will do for the few ladies who wrote to me for the original recipe.
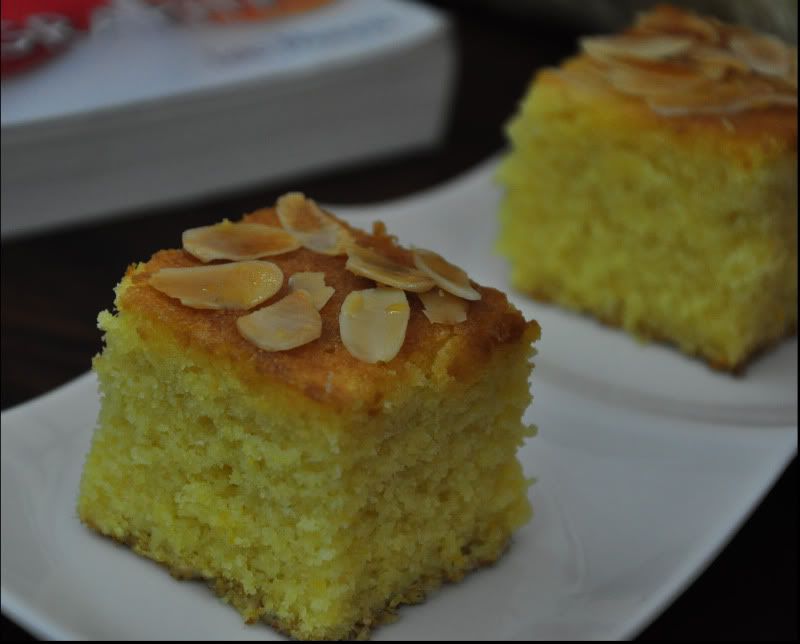
Honey Citrus Semolina Cake II
Ingredients:
6 eggs, separated
100g sugar
100g dessicated coconut (I used 75g)
140g flour
270g semolina
25g ground almonds (I used 50g)
20g baking powder
240ml cornoil or canola oil
300ml freshly squeezed orange juice
60ml lemon juice
1 teaspoon each grated orange and lemon zest
240ml orange marmalade
Honey Citrus Syrup
3/4 cup sugar
2 tbsp honey
1/2 cup water
1/2 cup orange juice
1/4 cup lemon juice
(You can use 3/4 cup orange juice and omit the lemon juice but I prefer a mixture of orange and lemon juice)
Method:
1) Heat oven to 180 degree C
2) Grease and line a lamington panwith parchment paper making sure the paper extend 3cm above the pan.
3) Sift flour and baking powder together. Add in the coconut, ground almonds and semolina and stir to combine well.
4) Mix oil, beaten yolks, marmalade, juices and zest together. Stir in the dry ingredients.
5) Meantime, whisk egg whites and sugar till stiff peaks form.
6) Fold the egg white to the flour mixture taking care not to deflate the egg whites too much.
7) Pour mixture into the prepared tin and sprinkle with some almonds slivers if desired.
8) Bake for 30 minutes or until a toothpick inserted in the middle comes out clean with no sticky crumbs.
() While cake is baking, prepare the syrup by boiling the liquid till it is reduced to slightly more than half a cup.
9) Pour hot syrup over the cake the moment you remove the cake from the oven. Cool in the pan. Cut and serve.
Monday, May 25, 2009
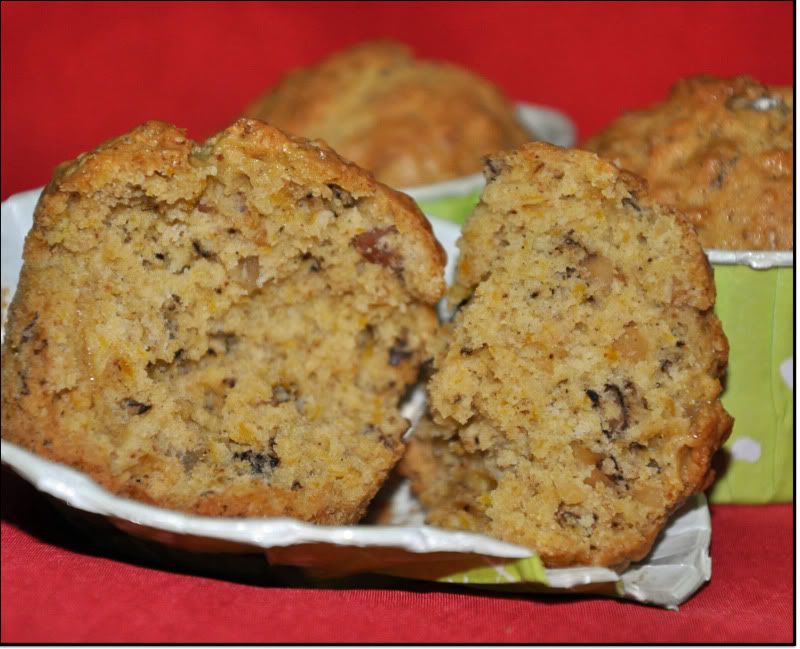
Pumpkin Ginger-Nut Muffins
Remember after last week's pumpkin mee suah cake I had this piece of pumpkin leftover? Well I made some Pumpkin Ginger-Nut Muffins a couple of days after that. I did not know what to expect of the final results as I was either short of this or short of that. After steaming whatever pumpkin I had, I realized that it yielded only one third cup of puree instead of the required one cup. I did not have plain flour and so substituted it with half-and-half of cake flour and self-rising flour plus another half teaspoon of baking powder. I have no ground nutmeg and so used only the allspice, cinnamon and ground ginger. And perhaps due to the shortage of mashed pumpkin, the mixture turned out very dry. I then added 75ml of unsweetened soya milk to loosen up the mixture. The muffins turned out super nice though! They smelt heavenly and the texture was just nice with a nice crunch coming from the chopped roasted walnuts and candied ginger. It was especially good eaten warm and just as good when cold. Best of all, they remained soft and moist even after 24 hours.
Pumpkin Ginger-Nut Muffins
Ingredients:
1-1/2 cups flour (3/4cup ea of cake flour + self-rising flour + 1/2tsp baking powder)
1/2 teaspoon of salt
1 cup sugar
1 teaspoon baking soda
1 cup cooked pumpkin purée (1/3 cup)
1/3 cup melted butter
2 eggs, beaten
1/4 cup water (plus 75ml unsweetened soya milk, if needed)
1/2 teaspoon nutmeg (I did not have this)
1/2 teaspoon cinnamon
1/2 teaspoon allspice
1 teaspoon ground ginger
1 cup chopped toasted walnuts or pecans (I used pecans)
2 Tbsp well chopped candied ginger
Method:
1) Preheat oven to 175°C.
2) Sift the flours, baking soda, baking powder and spices together. Stir in the sugar, chopped nuts and ginger and mix throughly.
3) Mix the pumpkin, melted butter, eggs and water together. Stir well to disperse the mashed pumpkin and then combine with the dry ingredients until just incorporated. Do not over-mix. If the mixture looks dry at this point of time, then stir in the soya milk.
4) Spoon mixture into a prepared muffin cups and bake for 25-30 minutes.
5) Check for doneness by inserting a skewer into the center of a muffin. If it comes out clean, it is done.
6) Cool on a rack.
Note: Ingredients in brackets are the changes made by me.
Sunday, May 17, 2009
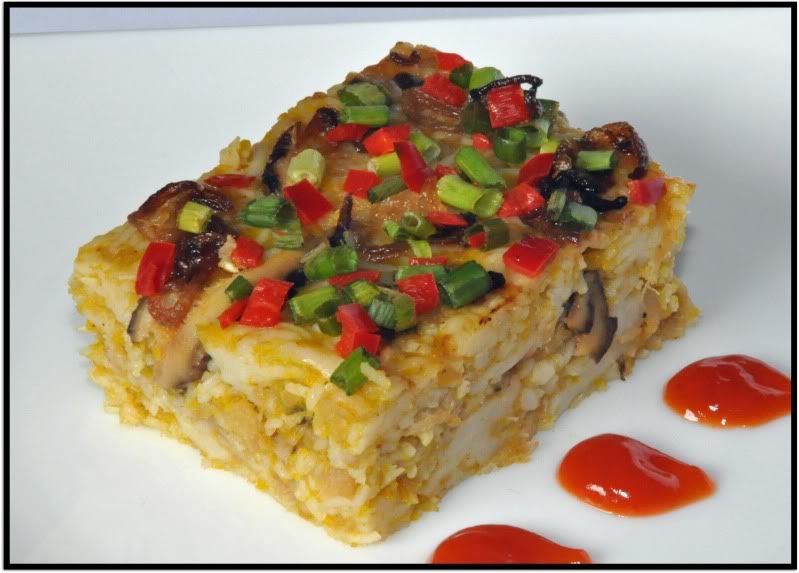
Pumpkin Mee Suah Kueh
Made this savoury Pumpkin Mee Suah Kueh for Saturday's breakfast. This is about the third or fourth time that I have made this. The first was in this earlier posting in August 2007.
This time around, I added some five spice powder to the pumpkin-pork mixture to give the kueh a better fragrance.
Now I am wondering what to do with the leftover piece of pumpkin sitting in my fridge??!!
This time around, I added some five spice powder to the pumpkin-pork mixture to give the kueh a better fragrance.
Now I am wondering what to do with the leftover piece of pumpkin sitting in my fridge??!!
Sunday, May 10, 2009
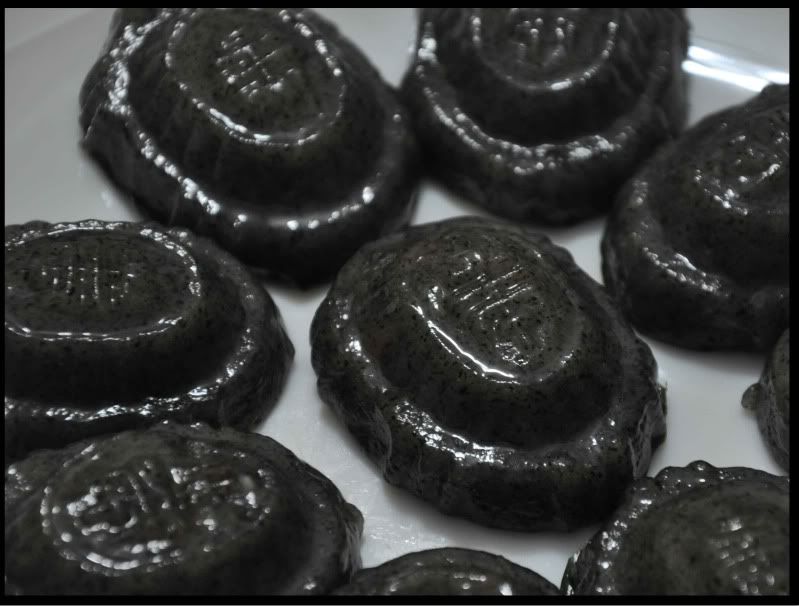
Orh Ku Kueh
To translate directly from Hokkiean dialect, 'Ku' means tortoise whilst 'Kueh' means cakes. The Ku Kuehs comes in a myraid of colors:- Purple, Green, Yellow and the very popular Red. The cake is shaped like a tortoise and therefore Ku. The 'Ang'(Red) Ku Kuehs are commonly used during celebrations like weddings, baby's full month and birthdays to signify longevity as tortoise are known to live till a ripe old age. The purple, green and yellow are the more 'modern' creations in the recent years with purple yam, pandanus juice added to give the skin the distinctive purple and green. They are usually filled with a sweet filling of mashed mung beans or peanuts. The Yellow Ku Kueh are usually filled with sweet mung beans to which mashed durian flesh has been added.
The mini Kus, each measuring 6cm long and 4.2cm across.
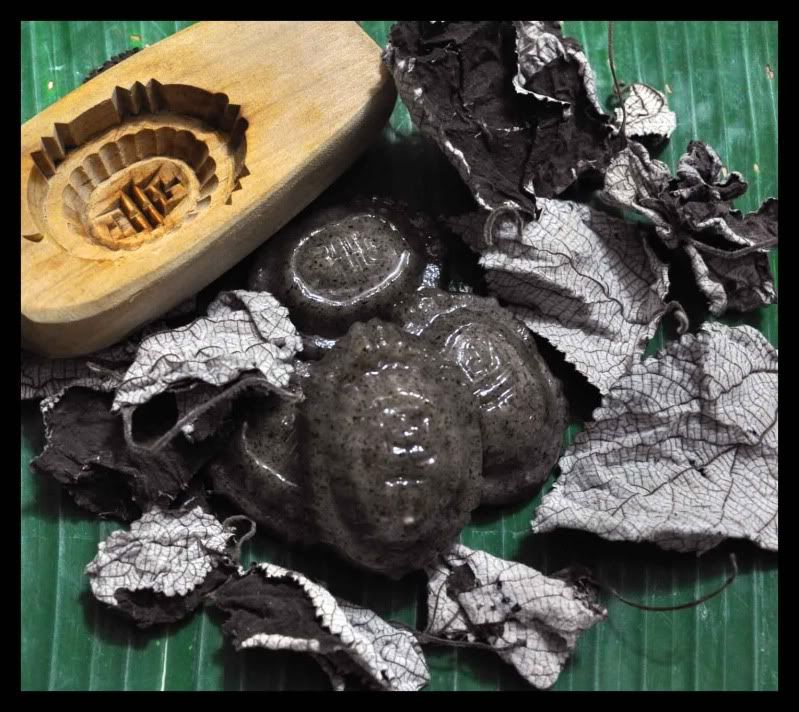
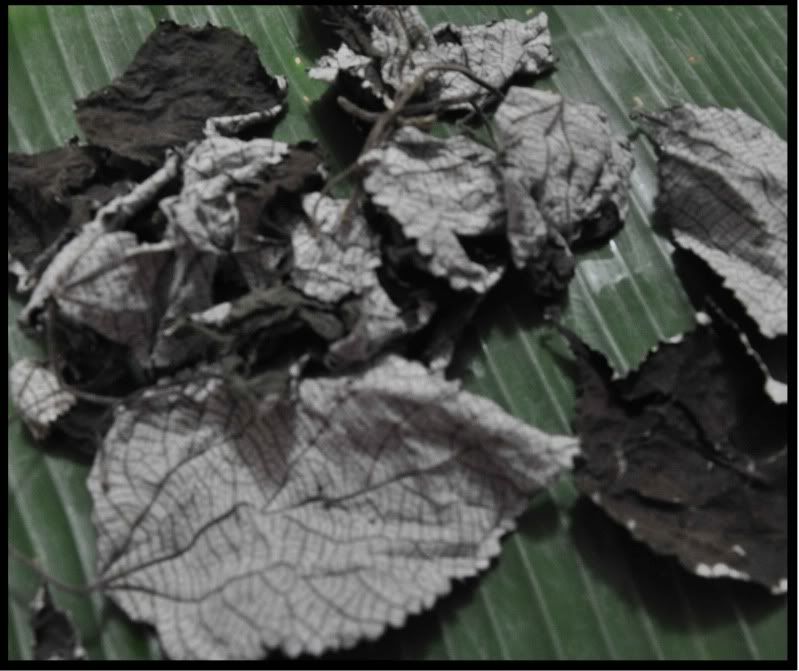
The 'Orh' (Black) Ku Kueh or Black Tortoise Cake which I have here could have been a Hakka snack. I am just guessing as these black ku kueh gets it black hue from the leaves of the Rami, Choy Yip or Mugworts plant. These leaves are favored by the Hakkas and widely used in their traditional cakes to give them their distinctive black and I believe, for their medicinal properties too!
Anyway,this is the second time that I have attempted this kueh and the skin is much softer than the first attempt which was more chewy. I had added a spoon of rice flour to reduce the chewiness that comes from a skin made with 100% glutinous rice flour. Some recipes for the sweet Kus has mashed sweet potatoes or yam added to give the skin a softer bite while retaining the chewiness.
These black Kus are different from the usual Red, Purple, Yellow or Green Kus as it uses a savoury fillings of chai por (preserved radish) and minced pork which is fried till fragrant and then given a kick with liberal doses of white pepper. The skin however is sweet. In fact, the skin is much sweeter than the sweet ku kuehs. I suppose this is tactical to give the snack an interesting balance of taste from the salty preserved radish.
Fresh or dried, tt is quite difficult to find mugwort leaves here in Singapore. I got the dried leaves shown here from Johor Bahru. The fresh leaves are even more difficult to come by unless you are living in areas where there is a large community of Hakkas.
Traditional Black Angku
Filings:
100g minced chai poh, soaked to remove excess salt
100g minced pork
Seasonings:
1/2 tsp sugar
1 tsp dark soy sauce
1/2 tsp pepper
Marinade:
1/4tsp salt
1 tsp soy sauce
1/2 tsp sesame oil
1) Mix the marinade with the pork and leave in the fridge for one hour.
2) Heat a work with a little oil and saute chai poh till fragrant, then add the minced pork and seasonings. Drizzle in a little water and stir fry well. Dish up and cool.
Skin:
150g choh yip/fresh rami leaves
130g caster sugar
200g glutinous rice flour
25ml cooking oil
125-150ml water
Glazing:
2 tbsp pre-cooked oil
Banana leaves cut into shapes slightly bigger than the mould you intend to use. Brush leaves with oil.
Method:
1) Wash the rami leaves and boil with water for 30 minutes. Remove, drain off excess water and leave aside to cool before blending into a paste.
2) Place the glutinuous flour into a mixing bowl.
3) Boil the water and sugar till melted. Add in the paste and stir to distribute the paste.
4) Pour the hot syrup into the glutinous flour and quickly stir into a dough.
5) Place the hot dough onto a clean table, add the oil and knead till you get a smooth and shiny dough.
6) Scale dough into pieces and roll into ball.
7) Flatten each piece and wrap with the fillings, seal the edges and roll into a ball.
8) Dust with extra glutinous flour before placing into the mould. Press the ball into the mould with your palm and knock the mould to dislodge the kueh. Place on a greased banana leaf.
9) Steam over low flame for five minutes, uncover steamer cover, glaze kueh with cooked oil, Cover and steam for another 2 minutes.
Note:
The original recipe suggested to 'wash' off the excess glutinuous flour from the shaped kueh under a tap (slow water). I did not do it as I use minimal flour to dust the kueh.
As I mentioned, I added some rice flour for a softer skin. What I did was to remove 1/2 tbsp of glutinuous flour and replace with 1/2 tbsp of rice flour.
I used 10gms of dried choh yip which has been soaked overnight to soften before boiling. I cut off the hard stems before weighing the leaves and also to avoid having hards bits of stems in the skin.
You may wish to reduce the sugar for the skin, I find it too sweet.
Wednesday, May 06, 2009
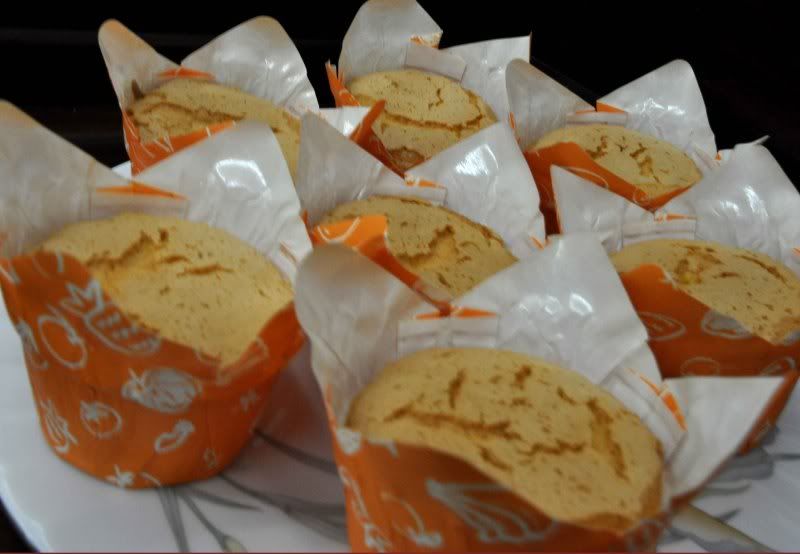
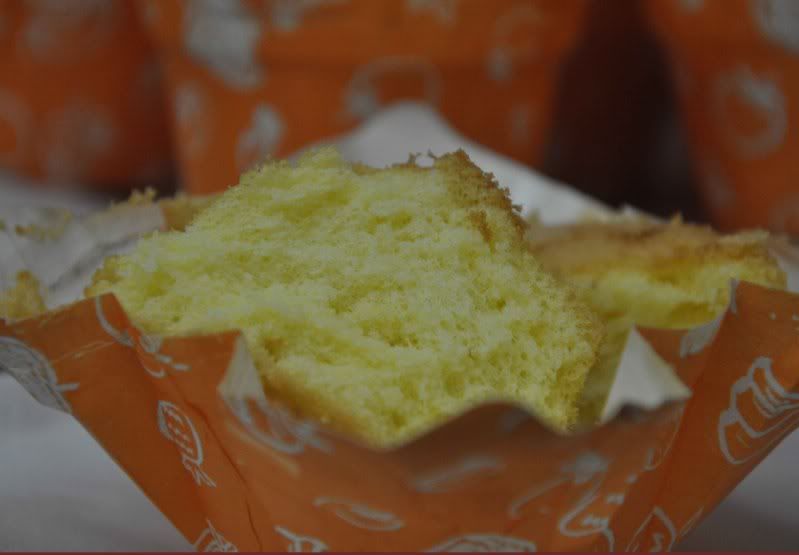
Featherlight Sponge Cupcakes
I bought these pretty cake cases some time back and I had entirely forgotten about them until last week when I was looking for some cake cases to put the Chocolate Mayonnaise Cakes.
As the cases are rather big, I decided against making muffin as I have never like them baked jumbo-sized. A featherlight sponge would be ideal as you can finish the whole cupcake and yet not feel stuffed.
They turned out pretty nice and I love how the cakes can be removed so cleanly without sticking to the insides of the cases.
A slight tug at the corners and the case unfolds easily to reveal the cake.
If the photos seemed a bit blurry, well you are right! I bought a new cammy, a Nikon D90 over the weekend and I am still struggling with the instruction manual and learning how to use it. So until I master how to select the correct aperture, shutter speed and ISO settings, be prepared for more out-of-focused pictures.
Saturday, May 02, 2009
Chocolate Cake with a Difference
This is one of my favorite chocolate cake. It is a cinch to make. No mixer is required and once all the ingredients are measured, it takes just a stir with a hand whisk and the cake is ready to be baked in two minutes flat.
What I love about this chocolate cake is that it is very soft and moist although no egg or butter is used. The secret to the softness and moistness comes from the mayonnaise and buttermilk. It may sound gross as you will hardly associate mayo with cakes but this is truly one cake which you have to try to believe how wonderfully the ingredients meld together to give you a chocolate cake with a difference.
For a more luxurious treat, frost the cake with a chocolate ganache.
MAYONNAISE CHOCOLATE CAKE
Ingredients:
110g mayonnaise
125ml buttermilk
1 tsp vanilla essence
120g all-purpose plain flour
20g cocoa powder
1-1/2 tsp bicarbonate soda
110g sugar
Method:
1) Line a 7" square baking tin with parchment paper (no need to grease).
2) Sift flour, cocoa and bicarbonate soda together.
3) Place the sugar and sifted flour mixture into a bowl.
4) In a separate bowl, mix the mayo, vanilla essence and buttermilk till smooth.
5) Add mayo mixture to the flour and mix till the batter is smooth.
6) Pour mixture into prepared pan and bake at 170 deg C for 20-25 minutes.
Note:
a) If you have no buttermilk, you can add 1-1/2 tsp of lemon juice to a glass of milk to make up to 125ml.
b) For a taller cake, make 1.5 times the recipe above and bake 40 minutes.